

|Articles|April 1, 2008
Vital pulpotomy, root canal therapy, avulsion, luxation (Proceedings)
Author(s)Peter Emily, DDS, DAVDC (Honorary)
Vital Pulpotomy is the treatment of choice when treating healthy, freshly exposed pulp in immature animals where the root apex is still open and the dentine wall is thin.
Advertisement
Vital Pulpotomy is the treatment of choice when treating healthy, freshly exposed pulp in immature animals where the root apex is still open and the dentine wall is thin. The remaining treated vital pulp will continue to produce dentine. Closing the apex and thickening the dentine wall. Following the removal of the coronal pulp, the remaining healthy pulp is encouraged to produce a secondary dentine bridge by treating it with calcium hydroxide. This is rarely the technique of choice for mature animals with closed apices and thick dentine walls, unless performed under sterile conditions as a disarming procedure.
If the pulp is treated within one hour of accidental exposure, and inflammation and infection are minimal. The prognosis is good. The longer the pulp has been exposed, the poorer the prognosis. The health of the pulp can be assessed by the color and flow of the pulpal blood on excising the coronal 8 mm of pulp; bright, red, free-flowing hemorrhage suggests healthy pulpal tissue. This is a very subjective assessment and should be used with caution. It is a helpful guide in situations where the time of the exposure is unknown.
Surgical crown height reduction is a sterile procedure, which should prevent infection of the pulp. The procedure is usually limited to the canine teeth, where it may be used to treat traumatic malocclusions (e.g. medially displaced lower canines impinging on the hard palate) or as a disarming technique.
Procedure
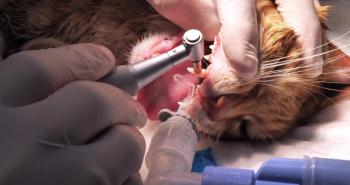
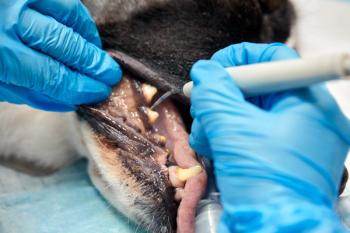
1. A radiograph is taken if possible to check for additional fractures and other complicating factors. The surgical site is isolated and disinfected with a suitable agent such as Maxicide or Betadine or Chlorhexidine.
2. If possible isolate the tooth from contamination by wrapping the sterile glove. A hole is made in the glove for the diseased tooth to protrude through.
3. Select a round diamond bur that will approximate the exposed pulpal diameter and place it preferably in a high-speed dental hand piece. With sterile water irrigation the diamond bur is inserted into the pulp chamber. Cutting through the coronal pulp to a depth of 8-10 mm. At high speed. A sharp diamond bur cuts the tissue without tearing, as would be the case with steel or carbide burs. Care should be taken to avoid pushing dentine shavings onto the pulp, as this will increase pulpal hemorrhage
Access to the pulp chamber may be enlarged as necessary with a larger diamond bur. The pulp is amputated as a traumatically as possible to remove any infected pulp and create space for the medicaments to treat and protect the pulp. The aim is to reach healthy pulpal tissue while minimizing damage.
4. Hemorrhage, if inserting the blunt end of large sterile paper points or a small damp sterile cotton pellet into the canal and gently pressing them on to the pulp control present. The paper points should not be continually removed and reinserted, but left in contact with the vital pulpal tissue for 3-5 minutes to encourage clotting. When sterile cotton wool dampened with sterile saline is used to control hemorrhage; care must be taken not to leave any threads of cotton wool in the canal.
Hemorrhage in healthy is usually controlled in approximately 5 minutes. Hemorrhage continuing beyond this time usually indicates the presence of inflamed pulp; this must be removed. Another 1 mm of pulp is amputated and the paper points or cotton reapplied. If hemorrhage is still uncontrolled the procedure is repeated. Continual hemorrhage usually indicates advanced pulpal pathology. Conventional endodontic therapy is indicated in these cases.
5. Calcium hydroxide powder is placed directly on to the pulp this will control residual minor hemorrhage. The powder is carried to the vital pulpal tissue on a sterile plastic filling instrument (beaver-tail) and inserted in small increments into the pulp chamber with the blunt end of a sterile paper point. The calcium hydroxide powder is gently packed on to the pulp a depth of 3-4 mm.
Hard-setting calcium hydroxide cement, such as Hypo-cal, can be placed on top of the calcium hydroxide powder with a ballpoint applicator to provide additional protection and insulation of the pulp. The hard setting calcium hydroxide lends some strength to the base calcium hydroxide.
A suitable bur such as a pear-shaped bur, size 330, is used to clean the remaining coronal 4 mm of pulp chamber walls, removing excess cement and debris.
A very slight undercut is made into the pulpal walls to create a retentive shelf for the final filling. As little dentine as possible should be removed when making the undercut so to minimize weakening of the tooth. The site is flushed with pressurized water and dried with oil free air.
A glass-ionomer or composite is used to fill the prepared site. The manufactures. Instructions should be followed exactly in preparing the tooth's surface and mixing the materials. Using the round end to the plastic filling instrument. The material is packed into the prepared site. It is essential that the restorative material be tightly condensed against the cavity walls.
6. Rough tooth edges and restorative material are smoothed with a finishing bur, diamond, or sandpaper disk. Followed by rubber abrasives-polishing- wheels.
7. A radiograph is taken for evaluation of the procedure, and for comparison with one to be taken 6-9 months post-operatively. The 6-9 months postoperative radiograph should show thicker intercanal walls, a closed apex, and possibly the formation of a dentinal bridge between the calcium hydroxide and the pulp.
Pulp Physiology
Anatomy
Dentinal pulp occupies the interior cavity of the tooth. It consists of loose connective tissue intercellular substance, vessels, nerves, and fibers. Anatomically, the pulp is divided into a coronal pulp and root pulp, corresponding to the anatomical crown and the root. The anatomical crown is covered by enamel. In older animals, there may be differences in the distribution and density of cells and fibers of the root canal, however there is no principal difference in the tissue
Constituents. The outline of the pulp chamber, particularly in young animal's teeth, usually follows the exterior morphology of the dentin. As the animal ages the pulp chamber is reduced by continual dentinal deposition throughout, and markedly reduced in areas of attrition.
Histology
The pulp morphologically is divided into four areas: 1) the odontoblastic layer covering the periphery of the pulp chamber, enclosed in dentine, with processes extending into the dentinal tubules. 2) The layer of Weil (cell poor layer), that appears next to the odontoblastic layer in mature teeth 3) a cell rich layer, between the cell poor layer and the central pulp and 4) the pulpal center. The pulpal center differs from the rest of the pulp only by having a smaller number of cells per unit than the cell rich layer.
The pulp connects with the periapical tissue through apex in each root, with the possibility of many shapes and apical foramina in each tooth. The vetodontist must be aware of this phenomenon. It is of the utmost importance in endodontic therapy. In young animals in which the apical foramen is not yet fully developed, the pulp connects with the surrounding periapical tissue in a wide area. During development of the root, the foramen narrows by lengthening of the root and by deposition of dentin and cementum, but during this period the walls of the foramen still consist entirely of dentin. With increasing age and with exposure to physiologic functioning, a layer of cementum may cover the dentin at varying lengths into the root canal. Cementum does not maintain an equal distance from the foramen throughout the circumference of the root canal. Root development usually results in one main and one or more lateral canals, in ground sections, appearing as an apical delta of varying configurations.
Lateral or accessory canals, though not as common in dog and cats, may occur and connect the pulpal tissue with the periodontal ligament at any level of the root, but are most frequently found in the apical third of the root. Connective tissue of the pulp continues directly to the periodontal ligament through these lateral and accessory canals. Endodontic success may be influenced by the obturation of these canals especially those of significant diameter. In cases of progressing periodontal disease, if the bacterial plaque reaches and involves the soft tissue of lateral canals, pulp involvement will result.
Pulpal Function
Pulpal functions are formative, nutritive, sensory, and defensive.
Formative in that it produces dentin. The development of the pulp is a gradual process that varies with the individual tooth. Development of the pulp takes place after the development of the dental organ, from mesenchymal cells, known as the dental papilla, directly under the dental organ. A distinct basement membrane divides the cellular elements of the dental organ and the dental papilla from each other, and the concentration of cells in the dental papilla stands out clearly from the surrounding oral tissues.
Dentin and pulp share an integral relationship with the odontoblastic processes. When a lesion invades the dentin, the odontoblastic processes and the pulp are involved.
As maturation occurs additional layers of dentin are added. Each dental tubule containing a vital odontoblastic. The dentinal tubule tapers to a cone like shape to the dentinoenamel/dentinocementum junction. The dentinal tubules and odontoblastic process are less voluminous at the periphery of the tooth tapering to an almost closed structure at the cemental wall. The cellular, cytoplasm content of the dentinal tubules is significant in all endodontic treatment. Open dentinal tubules can lead to pulpal pathology.
Normal healthy pulpal tissues continue dentinal deposition at a slow rate throughout life. This is referred to as "calcifying down" of the pulp chamber. Pulpal pathology decreases dentinal deposition. Dentin deposition ceases with tooth mortality
Nutrition
The pulp provides nutrient to the surrounding tissues during development. After development dentin metabolism continues via the odontoblastic processes. The narrow pulp canals of older animals continue to remain vital with pulpal circulation intact and functional.
Sensory
The sensory function of the pulp is response to pain. This is accomplished through the nervous intervention via the apical foremen. Nerve bundles enter the pulp splitting into finer bundles then into unmylinated fibers that enter the odontoblastic layer. Pulpal nerves seem to remain unchanged in older animals. After pulpal necrosis of the coronal pulp with apical inflammation, nerves may still persist in the apical area.
Defense
Pulpal response to injury is inflammation. Inflammation produces a chemo tactic response that slows the destructive action to the pulp. Continual irritation will result in pulpal death in spite of a strong response to the irritation from a well-vascularized pulp.
Vessels
The dental pulp is a blood rich organ. The numerous vessels that pass through the apical foremen and are distributed throughout the pulp. Most vessels are thinned walled with large lumen. When circulation is cut off, as seen with traumatic severance of vascular supply to the pulp, or periodontal involvement to the apical area, pulpal necrosis result form lack of nutrients to the pulp. It has been demonstrated that the pulp contains lymph vessels through experiments with calcium hydroxide and its rapid uptake into the pulp during pulp capping and pulpotomy procedures.
Pupal Pathology
A basic understanding of pulpal disease is needed to establish a need or lack of for endodontic therapy, and to predict the results of treatment.
Age Considerations
Aging pulp tissue undergoes reduction of tissue volume, cellular components, nervous tissue, odontoblasts, and vascular supply. With the closing down of pulpal dimensions through continual calcification by odontoblasts, and reduction of pulpal components the pulpal response to injury is impaired.
Pulpal insult can set up the inflammatory process through the dentinal tubules, by direct dentinal insult of topical irritants, through Anachoresis, localization of blood-born bacteria in hyperemic pulp, or as a result of periodontal disease in combination perio. /endo. Lesions.
Pulpal inflammation is the result of trauma, pulpal exposure as the result of coronal fracture, bacteria, pulpal necrosis with abcessation, iatrogenic factors, or idiopathic in origin, such as internal resorption from unknown factors.
Pulpal pathology passes from a reversible hyperemia, to an irreversible, hyperemia, extending to a serious pulpitis, and ending in a necrotic pulp.Periapical inflammation and abcessation, (apical periodontitis), have a chronic or acute nature, is an extension of the pulpal inflammatory response.
Acute periapical abscess occurs when bacteria invade the pulp, destroying the pulps defenses. The localized tissue results in pus formation. The acute phase is usually transitory, resulting in a chronic apical periodontitis, with drainage via fistula formation, or through the exposed root canal.
Endodontic therapy deals with the contents of the tooth; however it is the surrounding structures and their response to therapy that determines the success or failure of endodontic treatment.
Pulp Capping
Pulp capping has been widely used in human dentistry for years in the treatment of carious lesions without a history or symptoms of pulpal pathology. There are two basic pulp capping procedures or techniques for these deep carious asymptomatic lesions; direct and indirect pulp capping therapy.
Indirect Pulp Capping
Advertisement
Indirect pulp capping is performed when total removal of caries would result in pulpal exposure. The natural reparative mechanism of the pulp are utilized in the nearly exposure of the pulp. In this procedure the outer layers of carious dentine are removed. The underlying affected dentine will mineralize the odontoblasts, allowing the pulp to form reparative dentine, therapy avoiding pulpal exposure.
The overlying surface caries is removed to the dentino/ enamel junction with a large round burr. All remaining caries is removed except that just over the exposure site.
A sedative dressing of calcium hydroxide is placed over the remaining caries and areas of deep excavation close to the pulp chamber. The tooth is restored with zinc oxide/eugenol composite or amalgam.
The tooth is reentered in 6-8 weeks, for the primary indirect capping may eventually leak and lead to a reactivation of the carious process and pulpal involvement the remaining caries is carefully removed if reparative dentine has attained a sufficient depth to allow removal of the affected dentine without exposure. The tooth is restored with a hard setting calcium hydroxide base, followed by a permanent restoration.
Direct Pulp Capping
Direct pulp capping is the application of a medicament to the already or mechanically exposed pulp in an attempt to preserve tooth vitality. This differs from pulpotomy in the degree of tissue removed. In pulp capping only a small or portion of the pulpal tissue is removed, but treatment, and medication follows that of pulpotomy procedures. Disagreement exists as to direct pulp capping procedures as a part of therapy for mature permanent teeth. Vital techniques must be employed in incompletely developed permanent teeth with exposed pulp. After root formation has been complete, conventional endodontics may be performed.
Exposure of a traumatic organ, the most commonly seen cause in dogs and cats, has a much better prognosis due to lack of long standing inflammation associated with dental caries. The size of the pulpal exposure does not affect the healing potential.
All pulp procedure should be performed under as sterile, or aseptic conditions as possible. Care must be exercised not to contaminate the exposure with surrounding microorganisms.
The marginal, or surface seal is very important following pulpal therapy. Long standing leakage of the final restoration can allow the ingress of microorganisms and contaminants into the pulpal tissues resulting in a reestablished exposure.
Aged Animals
With aging the endodontic system goes through a continual calcification, gradually closing of the lumen of the root canal to a fine diameter as it approaches the apex. These older teeth compromised endodontically can be very difficult to treat, for the lumen is difficult to locate, as well as, debride. A thorough knowledge of root canal morphology, the degree of root divergence and direction is essential. It is very easy to perforate these canals either laterally or through the pulpal floor while trying to gain access to these constricted canals. Placement of a finger in the muco-buccal fold on the lateral aspect of each root to detect the exact angle of each root prior to attempting access to the canal will help to prevent mechanical root perforation. An access opening into the root canal can be directed in the right direction by following the long axis of each root using the operator's palpating finger as a guide. This procedure works very well for upper fourth pre-molars in older dogs. The palatal root of the upper fourth premolar being the smallest in both size and root canal diameter is often fine and difficult to access. If it cannot be accessed it is removed, (hemi section), at the same time as conventional endodontics is performed on the two lateral roots. This does not weaken the tooth to a large degree. The operator is cautioned while trying to find the palatal root canal to guard against entering the furcation between the palatal root and the crown believing that the canal has been entered. The palatal root is much smaller than the two lateral roots. Radiographs taken during therapy with endodontic files in place are essential to verify correct file position. If the palatal root cannot be entered, it is removed by hemi section. Often in an attempt to enter the occluded palatal root, a furcation perforation is made. The operator feeling as though the palatal canal has been prepared will obturate the furcation space with gutta percha. A furcation perforation and gutta percha placement into radicular bone will result in endodontic and periodontal failure.
The palatal root is separated from the crown in a medial caudal to lateral rostral direction through the furcation. The palatal root is lightly separated from the crown with an elevator to free it from the crown. Usually attempted elevation will fracture the palatal root cusp tip leaving the root fragment in place. Continued elevation of the root fragment will likely result in driving the root fragment into the turbinates. The root fragment is best enucleated with a high-speed hand piece and a #330 carbide bur in a high-speed dental hand piece under water irrigation and a good light source. The bur is directed along the long axis of the root fragment in a circular motion to remove all the root tissue to the apex. This is a very clean, time efficient, trauma free way, to remove retained root tips while lessening the chance of displacing the root tip into the turbinates by the aggressive use of root tip picks.
The entrance to the pulp chamber from the palatal root can be restored with a simple composite filling, although the entrance to the pulp chamber is often obscure.
Older calcified root canals may not be amenable to total debridement to the apex. Normal root canal morphology is elliptical with root canal diameter narrowing toward the apex. As the root canal chamber calcifies down with age, the apical end often is difficult to access and debride to the apex. Root canal debridement is performed as far as it is possible apically. Some added length could be attained with continued filing with increasingly larger files and chelating agents, (R.C. Prep, By Premier Dental) which decalcify and soften dentine.
The canal is obturated to the furthermost prepared apical extent. Often radiographic verification will show the fill to be two to three mm. short of the apex. These partially occluded canals have a rather good history success with conventional endodontic therapy. Conventional root canal therapy of a calcified or closed down root system can fail; as seen clinically by facial swelling, fistulas tract formation, with radiographic verification. The tooth can be salvaged through surgical endodontic therapy.
Radiographic Interpretation and Diagnosis
Along with radiographic interpretation and diagnosis it should be remembered that many oral lesions appear similar to endodontic lesions. Accurate radiographic diagnosis is not always possible. An accurate history, when possible should be taken with attention to possible systemic disorders. Good clinical evaluation should include a history of swelling, fistula formation, tooth crown color or coronal appearance that reflects tooth vitality, palpation over the apex to determine swelling, and percussion along the long axis to check for over reaction. Response to percussion indicates that the infection has extended beyond the pulp into the periodontal ligament space creating an apical periodontitis, (inflammation of the apical part of the periodontal ligament). The pressure buildup due to an increase of fluid in this small space will yield pain upon percussion. Tooth mobility can increase when an endodontic lesion is present.
Radiographs of good diagnostic quality, accurate interpretation, with a complete knowledge of radiographic landmarks are essential to good diagnosis. A review of radiographic techniques, both intraoral and extra oral, to insure clear radiographs without elongation, foreshortening, or overlapping, to name a few radiographic pitfalls, is highly recommended.
A valuable landmark to radiographic diagnosis is the lamina dura, or bundle bone. This is a compact layer of bone lining the tooth socket. It appears as a thin white line lateral to the periodontal ligament. Often indications of pulpal necrosis can be seen as anomalies in the shape and continuity of the lamina dura and width and shape of the periodontal ligament. As exudates of an infected pulp exit the apex, they effect changes in the periodontal ligament and lamina dura that are evident radiographically. These are the first structures to show changes. Note: the lamina dura is not always present radiographically, for its presence or absence is determined by the shape and position of the root in relation to the x-ray beam. The x-rays passing through a socket, which tends to be oblong in shape, must pass through many times the width of the adjacent alveolus and are attenuated by the greater thickness of bone, producing the white line. Changes in the lamina dura are very significant, but they must be tempered by an understanding of the production of the lamina dura.
An acute primary abscess as the result of a rapid virulent infection can cause rapid pulpal death that proceeds quickly through the apex displaying an osteolytic lesion not present before. The pulpal exudates are first limited to the apical periodontal ligament space. This can produce tooth extrusion, loosening, or widening of the periodontal ligament space, to be seen radiographically.
Radiographic angle can show or fail to show radiolucency, especially foreshortening of the image, by poor vertical angle placement of the tube head. Although the periapical lesion is in contact with the apex and cannot be displaced it can often be hidden by poor radiographic technique.
Periodontal Endodontic Relationships
Periodontal disease and endodontic lesions can occur as separate or combined lesions. Simmom and Glick classified these lesions as follows: (1) primary endodontic, (2) primary endodontic with secondary periodontal, (3) primary periodontal, (4) primary periodontal with secondary endodontic, (5) true combined lesions.
Primary endodontic lesions may show mobility, fistula formation and drainage into the mucosa, or occasionally the gingival sulcus, with pulpal necrosis. X-rays show near normal crestal bone length. The lesion is resolved with conventional root canal therapy.
Primary endodontic with secondary periodontal involvement occurs as plaque accumulates along the tooth root surface as pocket formation develops. The tooth, if initially an endodontic lesion will need both periodontal and endodontic therapy. The prognosis is very good with healing of the pulpal alveolar lesion after conventional endodontic treatment and simultaneous elimination of periodontal conditions by non-surgical or surgical methods.
Primary periodontal lesions with microbial plaque in association the periodontal defect and root surface are initially the cause of an inflammatory periodontal lesion. The lesion if allowed to progress will cause destruction of connective tissue and loss of the tooth.
Primary periodontal lesions with secondary endodontic involvement can occur if a periodontal lesion is allowed to progress with exposure and communication with lateral canals. Exposed root surfaces free of protective cementum can allow entrance to the pulp through open dentinal tubules. Periodontal therapy procedures themselves may lead to secondary endodontic lesions. Scaling curettage and flap procedures may open lateral canals, dentinal tubules, or both, to the oral environment, resulting in pulpal disease. Radiographic examination may show the primary periodontal and secondary lesion difficult to diagnosis. Teeth that do not respond to periodontal therapy may be endodontically involved, and show pulpal necrosis that continues to express toxins into the periodontal lesion. Here, endodontic therapy must be done to support the periodontal therapy.
Combined lesions may show facial swelling, or lateral swelling adjacent to the apex in the muco-buccal fold. Swelling of a periodontal nature is usually coronal to the muco-gingival junction, with exception in cases having furcation involvement. If the lesion is periodontal, a probe can be placed to the bottom of the swelling through the gingival sulcus. Endodontic swelling is not likely to reach the gingival sulcus until it has been present long enough to start drainage through the sulcus. Swelling can develop following root planing in cases of deep periodontal pockets if the pockets are not thoroughly irrigated after root planing.
Endodontic lesions can progress into periodontal lesions or vice versa. Through communication via lateral canals, or patient dentinal tubules that serve as portals for irritants to reach the pulp. Because dentinal tubule decrease in size as they approach the cementum, they act as a barrier to periodontal space contamination, but long time root planing leaves the root denuded of it's non porous protective cementum. The exposed tubule can then communicate bacteria into the pulp.
Prognosis of combined lesions leading to chronic endodontic-periodontal involvement is guarded. The prognosis for a periodontal lesion leading to an endodontic lesion is poor.
Treatment
Treatment of endodontic periodontal lesions should start with antibiotic therapy if swelling is present. Endodontic treatment should be done first, for the lost bone resulting from endodontic lesions will often regenerate spontaneously following endodontic therapy. When the defect will no longer improve, periodontal treatment may begin. This can include prophylaxis to bone grafting therapy for pocket elimination.
A common combination lesion in dogs is seen in the upper fourth premolar, where the caudal root has no bony support, with the rostral roots well supported in bone. These cases can best be treated by removal of the caudal root (hemisection) and conventional root canal therapy performed on the two caudal roots. The entrance to the pulp chamber of the retained caudal roots and crown can be restored with a composite filling material. The edges of the retained crown are rounded and planed with a number 7802 finishing dental bur and high-speed hand piece. Prognosis and function of the retained rostral portion of the upper fourth premolar without complications is good.
Complications from Iatrogenic Procedures
Iatrogenic procedures present as the result of improper technique, instrumentation, or lack of familiarity with possible anatomical variations. The majority of endodontic problems can be controlled with preoperative radiographs to determine endodontic morphology, position, size, shape, and abnormalities.
The most common complications are those of technique, and instrumentation. Problems of restricted and occluded canals, root fractures, large immature root canals, lateral root canal perforations, pulpal floor perforations, and broken endodontic files lodged in the root canals present added complications.
Occluded canals can usually be seen radiographically. As stated before, occluded canals are common in palatal in older dogs and cats. Success or failure, as stated before is directly related to the operator's ability to debride and obturate these restricted canals to their apical extent.
Conventional endodontic failure due to restricted canals is verified radiographically. Usually only one root has failed, but occasionally two roots can fail. Surgical endodontics with retrograde filling of only the effected root is performed.
Large Open Canals as discussed under therapy for young animals can be utilized to treat open canals in older dogs whose tooth was endodontically compromised at a very young age. The lumen ceases to calcify or close after pulpal death. These teeth show bilateral asymmetry in canal diameters when compared radiographically. If the apex has failed to close, an apexification procedure, as described earlier is performed. If the apex has closed, the tooth is treated with conventional endodontic procedures.
Treatment
Total canal obturation is difficult in these large diameter canals. After the canal is thoroughly cleaned and debrided, a root canal cement of choice, preferably a zinc oxide-eugenol type is place into the canal with the aid of a spiral-filling instrument in a slow speed dental hand piece. If the lumen is so large that the largest gutta percha points will not fill the canal, bulk gutta percha, in the form of hygienic or temporary stopping can be heated and formed into large points. Performed or hand made gutta percha points are dipped in chloroform, a solvent for gutta percha, to soften them. The moistened gutta percha points are placed into the cement filled root canal chamber and condensed laterally and apically with endodontic pluggers. Additional gutta percha is added to the canal in like manner until the canal is filled. This chloropercha type technique produces a very dense filling and presents radiographically, a complete root canal obturation.
Root and Crown Fractures
Root and crown fractures are generally the result of trauma. Crowns or cusp fractures can involve the pulp or be confined to the dentin without pulpal exposure. Coronal fractures into the pulp should be treated with pulpotomy, apexogenisis, or apexification procedures if in immature teeth. Coronal fractures of mature teeth of a long-standing nature involving the pulp are treated by conventional root canal procedures.
Coronal fractures are angular, transverse, or longitudinal, (along the long axis). Longitudinal coronal fractures present a good prognosis if the fracture is incomplete and stops short of the crestal bone. Those longitudinal fractures that extend beyond the crestal bone but do not involve the periodontium have a good prognosis. Both of the above must have full crown coverage to prevent additional cleavage. Endodontic therapy is rarely needed in supra-crestal fractures that do not involve the pulp, but usually is necessary in those of a subcrestal incomplete longitudinal nature. Complete longitudinal fractures present for no hope for tooth retention. Extraction is indicated. If the coronal longitudinal fracture is in a multirooted tooth, part of the tooth can be retained with the use of hemisection techniques. The retained root is treated with conventional endodontics with restoration of the access opening and pulp chamber entrance from the hemisected root with a dental restorative material of choice.
Root fractures of a transverse or horizontal nature are divided into three divisions, based upon anatomical position. These are root fractures in the apical one-third; middle one-third; and coronal one-third of the root. These root fractures involve cementum, dentin, and pulp. They constitute approximately three to five per cent of the trauma to the permanent dentition and are more common in older dogs and cats due to the lack of flexibility to the socket as seen in younger animals. There is usually no fracture to the crown, but slight mobility, tenderness, possible elongation, and or discoloration are clinical signs. Radiographic examination is a must to complete the diagnosis. Radiographs taken immediately following trauma, may fail to show root fracture. Films taken one to two weeks later may disclose the fracture.
Horizontal Root Fracture
Horizontal root fractures have the ability to heal themselves, provided that the fragments are in close apposition and immobile in the position. A high percentage of horizontal interosseous root fractures do not need endodontic treatment, if there are no chronic periodontal complications. If microorganisms or epithelium invades the fracture site prognosis is poor for the coronal segment, but not necessarily the apical segment. The prognosis is most favorable for maintaining a vital pulp if the horizontal fracture is in the apical third of the root and least favorable if the fracture is in the cervical third. Prognosis is directly proportional to the ability of the operator to stabilize these interosseous horizontal root fractures. Andreasen, a human research endodontist, states that there is no difference in prognosis existing between fractures located in the apical, middle, or coronal third of the root, provided that the teeth are immediately repositioned and firmly immobilized. Excursions of the coronal fragment and inadequate splinting seem to increase the frequency of pulpal necrosis. Complications usually occur within two months of injury. It was observed that cementum will be deposited at the fracture ends of the two segments and the continuous deposition of cementum will join these two segments. There is a multiple hard tissue (dentin, osteodentin, cementum) that can form the uniting callus between the root fractures. It is essential that radiographs be taken whenever a traumatic injury to the head and neck has occurred in dogs and cats. Dark intensity films increase the latitude of diagnostic range. Additional radiographs should be taken of the questionable area with a plus and minus fifteen-degree vertical angulation in relation to the original to position. Because of partial involvement of a pulpal system in horizontal root fractures is usually confined to the incisal segment. It is felt that the traumatic forces are dissipating at the fracture site without severing the blood supply to the apical segment.
Collateral circulation may be reestablished through the fracture site of incisal segment. When the incisal segment becomes involved pulpally, only this portion requires conventional endodontic treatment. The incisal segment of the pulpal system is instrumented and treated with calcium hydroxide base as if it were and apexification treatment. When a sufficient calcified callus barrier has been generated, the calcium hydroxide should be removed and the incisal obturated with gutta percha. When both segments of the root are involved, treatment is needed for both portions. When the root segments are widely separated or the roots are generally greatly displaced, surgically endodontics should be performed on the apical segment. The reverse amalgam filling is performed in the incisal segment. That is a retrograde endodontic procedure after conventional endodontic has performed on the incisal segment. The incisal segment must have sufficient room in the arch. Splinting may be employed to aid in stabilization.
Avulsed Tooth
Avulsion by definition is the separation of a tooth from its alveolus.
Implantation of avulsed teeth is the returned of the tooth accidentally avulsed by trauma into its alveolus. Complications of reimplantation include internal and external root resorption, ankylosis, and inflammation. Inflammation in association with implantation is accentuated and becomes self-perpetuating formation that eventually advances to involve the adjacent alveolar bone. The inflammatory process interferes with the elaboration of repair tissue.
Procedure for Reimplantation
The extra oral time period has the greatest bearing on the success of implantation. For a long drying period purposes narcotic periodontal ligament fibers and directly effects the success of reimplantation. This prognosis is achieved by replanting a tooth within thirty minutes. This assured extra alveolar period favors retention of liable ligament cells, which in turn limit external root resorption. Combination of brief storage and saliva and milk was better than saliva only. Further studies shown that saliva was hypotonic, where as milk had a more suitable osmolarity for the periodontal ligament cells. Manipulation of root physically, damages the vital periodontal ligament. The root should be replanted as soon as possible. Root canal therapy treatment before reimplanting a tooth worsens the prognosis. Even more disastrous, scrapping or placing caustic disinfecting or other chemical on the root will further damage the prognosis. Caustic drugs kill the cementum site and coagulate the collagen fibers of the periodontal ligament. Intentional removal of the periodontal ligament is followed by excessive replacement resorption and ankylosis.
Neither pulp extirpation nor root canal filling with gutta percha should be performed before reimplantation. Immediately implantation and postponement of pulp extirpation and canal obturation is preferred treatment for avulsed teeth.
Root canal treatment, especially with calcium hydroxide obturation, should be performed no sooner than two weeks after reimplantation. Canal fillings should be delayed until after splinting, not only to preserve the viable periodontal ligament remnants of the teeth when out of the mouth for long periods, but also to maintain the maximum healing potential of the socket. Under no circumstances should reverse amalgam or other material fillings be used before reimplantation. Invariably these reverse fillings end up as islands of foreign material on the periapical tissues as resorption takes its toll. These reverse plugs prevent the full effectiveness of any of the calcium hydroxide that is placed two weeks post operatively.
Luxation
Luxation is described as the dislocation of a tooth out its alveolus. As the result of trauma, or a pathological process. Most cases of Luxation are absorbed by the periodontium, without apparent damage to the tooth structure. There is a distinction between a subluxated tooth and a luxated tooth. Luxation includes extrusive, intrusive, and laterally luxated teeth. Subluxation injury is one that results in abnormal loosening of the teeth without displacement. Luxation can result in degenerative ischemic changes. Subluxated teeth may have mobility, but usually they do not require splinting.
In luxated teeth, the vascular supply to the periodontal ligament and into the root canal is usually severed. The principals of treatment for luxated teeth are the same as for avulsed teeth, except the prognosis is usually better with luxated teeth. The chances for root resorption in luxated teeth are related to the severity of the Luxation, and the displacement. A passive splint is placed for one to two weeks. At two weeks the root canal is cleaned and obturated, with calcium hydroxide. One year later the tooth is can be obturated with zinc oxide and gutta percha. Both luxated and avulsed teeth show a high degree of mobility, and must be splinted for stabilization for four to six weeks.
Conventional Root Canal Procedure
Equipment
High-speed hand-piece (low-speed will suffice if' high speed is not available)
Burs: round-head size 2-4', or pear-shaped size 330) or 331
Barbed broaches: -30 mm and 45-50 mm lengths
Root canal files: K-files and Hedstrom files in 30 mm 55-60 mm lengths.
Sizes 15-80:and 90-140.
Chelating agent: this is a paste, which aids the debridement of the canal. Softens the dentine and lubricates the canal. AKA R.C. Prep'
Flushing solutions: sodium hypochlorite, (bleach in a 3ml syringe)
Locking dental pliers or forceps (for placing paper points and gutta percha)
Paper points: assorted sizes in 30 and 45 mm lengths.
Gutta percha (GP): assorted sizes 30 Lengths
Root canal filling cement: ex. Zinc oxide (powder) and eugenol or suitable calcium hydroxide base cement such as Sealapex (a slow-setting calcium hydroxide paste)
Mixing slab
Mixing spatula
Spiral paste fillers: assorted sizes in 45-60 mm lengths. Low-speed contra-angle hand piece. Root canal explorer. Endodontic plugger-spreader. Scalpel blade. Plastic filling instrument, ex. Beaver tail at one end and burnisher at the other;
Radiographic Equipment
Calcium hydroxide hard-setting cement (if using zinc oxide and eugenol cement and composite
Ballpoint applicator
Final filling material (composite. glass-ionomer or amalgam) with the recommended tooth surface-preparing agents
Finishing bur (egg. size 7901)
Finishing burs, disks, and abrasive rubber wheels cups or stones: or fine grade sanding discs.
Procedure
The objectives of' root canal treatment are a clean canal. An apical seal and sealed access.
1. The tooth is radiographed to ensure there are no complicating factors, which may favor a different procedure. The radiograph also helps to locate the apex exactly. The mouth is cleaned with Chlorhexidine or povidone-iodine paying particular attention to the affected tooth.
2. If there is no fracture of the crown through which the pulp chamber can be entered and the apex reached. An access is made through the crown into the pulp chamber. The access hole is made as small as possible. To minimize any further weakening of an already weakened tooth; however. It must be large enough to accommodate the file shafts otherwise a false sensation of reaching the apical stop may be encountered due to a file shaft becoming jammed in the access hole.
Access
The access cavity preparation is made to provide access to the root canal to the apex. There is usually a palpable bony prominence over the root of a tooth. Aiding to identification of the apex. A round (size 1 or 2) or pear-shaped (size 330 or 331) bur is used to make the access. When drilling into enamel. The initial 0.5 mm depth is cut at 90- to the surface: the drill is then angled towards the apex. This reduces the risks of slipping when starting the cut. The hole is drilled directly over the pulp chamber as follows.
For canine teeth where the entire crown is present, the access is placed on the lateral\rostral surface, 2 mm coronal to the gingival margin. The access to the pulp chamber is begun by starting the initial entrance at 90' to the enamel surface, then turning to point the bur at the apex and the pulp chamber (which runs down the center of the tooth). The apex of a dog's canine tooth lies apical to the rostral root of the second premolar.
Incisor access is made on the rostral surface, halfway down the crown. Incisors are small teeth with small pulp chambers, so it may be necessary to use a smaller bur (round, size 1).
Incisor access can be the lingual or palatal aspect of the incisor surface at the level of the Cingulum. .
Multi-rooted teeth; access holes are made directly over the root canal of each root. Occasionally one huge access hole can be making in severely compromised upper fourth premolars placed in the lateral wall of the tooth. From which all the root canals can be reached with flexible files. This may weaken the crown and is not the preferred method of accessing the pulp chambers of the upper fourth premolar and the lower first molar.
The palatal root of the upper fourth premolar is small and tends to flare out medially. It is easy to perforate the root furcation if the access preparation is directed laterally. Direct the bur towards the apex in a slightly medial direction. The anterior roots diverge apically in this tooth. Stop drilling as soon as the pulp chamber is reached. Gentle exploration with a 25 mm size 10 K-file or a root canal
Explorer will find the canal. Old canals are often difficult to find or are completely occluded. If cannot be found. The palatal root may be amputated and extracted or atomized with a small round bur. If the exposed end of the communicating pulp chamber, between the amputated palatal root and the rostral root, can be found, it is sealed with a filling material in the same way as the access is sealed, at the end of' the procedure.
A sharp root canal explorer is inserted through the access hole or holes to locate the canal entrance and direction. If the canal has not been entered, the direction of' the access hole is checked and adjusted to provide access to the canal. A little force on the explorer may push it through a thin remnant of dentine. Into the pulp chamber.
1. A 25 mm K-file, size 10 or 15, is inserted into the pulp chamber through the access hole. It is worked in and out against the sides of' the access hole to smooth the passage between the access and pulp chamber. With larger pulp chambers, larger files may be used. Always start with a small size and gradually work up to the larger sizes (size 15 then 20, then 25, then 30, and so on).
2. If vital tissue is present, a barbed broach is inserted into the pulp chamber as far as it will go without force. It is rotated many times to twist the pulp on to it. It is carefully withdrawn, bringing any intact pulp with it. The procedure is repeated many times until the broach comes out clean. If the pulp is necrotic, the pulp chamber will contain organized remains; there will be nothing with any form to engage the barbed broach.
3. Root canal therapy for canine teeth is begun by inserting a 55-60 mm Hedstrom file, size 15, lightly coated with a chelating agent or detergent into the canal worked back and forth until the approximate apex is reached. This apex often is felt as a dull thud. The rubber depth marker on the shaft of the file is moved along the file to touch the access, while the tip of the file is in contact with the apex. A radiograph is taken with the file in place to verify the position of the tip of the file. If it is at the apex, it is withdrawn and the markers on the other files are moved to mark the same length. In this way, the exact length of the canal is known. The rubber markers may be made by cutting sections of rubber band and threading one on to each file. Increasingly larger files, 20, 25, 30 etc. are inserted and worked in the canal, ending with the file at the verified apex while removing the pulpal contents.
The files are held between the index finger and the thumb; a gentle lateral pressure is exerted on the file with the third finger to guide the file onto the walls of the canal, so that all the walls of the canal are filed clean: the fourth finger acts as a fulcrum, resting on an adjacent tooth. Hedstrom files should not be rotated while in the canal as their tips fracture easily. Files with bent tips should be discarded to avoid their fracture in the canal. The smaller sizes are more fragile than the larger ones. The size of file inserted and worked in the canal is gradually increased until a size too large to reach the apex is used. (e.g. size 40) The file of the next size down (e.g. size 35) is reinserted into the canal and worked to the apex. The size of this file denotes the diameter of the apex (e.g. 0.35 mm diameter).
Files of increasing sizes are used to clean the walls of the canal, without reaching the apex. Filing is complete when clean white filings come out of the canal on the file.
4. The canal is flushed with .a sodium hypochlorite solution to remove any remaining debris and disinfect the canal. Recent studies have shown that sodium hypochlorite may be the final flushing solution of choice, although many operators prefer to use sodium hypochlorite then hydrogen peroxide then sterile saline, repeating this sequence several times and ending with a final flush of sterile saline. The animal's tissues (i.e. gingiva, mucosa and lips) must be protected from these solutions.
5. The canal is dried. Oil-free pressurized air is directed obliquely over the access. Air should not be directed straight down the canal, as this may force air emboli into the periradicular tissues. Final, thorough drying of the canal is achieved by inserting sterile paper points of an appropriate size and length into the canal, held in locking forceps. Larger sizes are used to soak up the bulk of the liquid, and then a size, which will enter the apex, is used to dry the apex. Many paper points are used until two or three successively are brought out dry.
6. The root canal filling cement is mixed on a mixing pad or slab to a creamy consistency (it doesn't quite run off the pad). Zinc oxide and eugenol (ZnOE) is antibacterial; it takes several hours to set and so is easier to use initially. Slow-setting calcium hydroxide cement (e.g. Sealapex) is also antibacterial and will stimulate the production of reparative dentine around the apex, possibly producing a better apical seal and apexification of open apices; it sets in 30-40 minutes in a humid environment (i.e. inside the root canal), but will remain liquid on the mixing pad for several hours.
The spiral paste filler of an appropriate size and length is inserted into the low-speed contra-angle hand piece. It is loaded with cement. By rotating counterclockwise in the cement. The loaded spiral is inserted into the canal and rotated clockwise at 1000-2000 rpm. This spins the cement off the spiral and on to the canal walls. It is slowly withdrawn while spinning, reloaded and reinserted. This process is repeated until cement exudes from the top of the canal. The rotating of the spiral tends to drive the cement apically, forcing any air bubbles coronally. Injecting the cement into the canal is not successful in a canal whose apex is less than size 60 (i.e. 0.6 mm diameter). As air bubbles tend to be locked in the apex, which prevents the apex from being sealed. Some authors obturate large canals; with apices greater than size 60, with cement fill only injecting cement as the needle is slowly withdrawn. This technique has not proven successful. Often due to an incomplete apical seal with cement alone.
7. A gutta percha (GP) point of the same size as the apex (e.g. size 35) is coated in cement and inserted into the cement-filled canal. It is pushed to the end of the canal and engaged in the apex, thoroughly sealing the apex (rather like a cork sealing the neck of a wine bottle). Accurately sized GP of a length suitable for canine root canals (i.e. 55-60 mm long) hopefully will soon be available, but until then, there are methods of forcing the shorter GP into the apex to affect a seal. Either melt two appropriately sized together end to end, preserving the measured diameter end (i.e. the 0.35 mm end); or melt the correctly sized (e.g. size 35) GP onto the end of a veterinary Length GP, (at present only available in size 'medium'); or push the 30mm into the apex with a plugger. Further GP loaded with cement is pushed into the canal with the aid of pluggers. An appropriate diameter spreader is inserted into the canal and forced in next to the master point GP. This pushes the GP firmly against the canal walls; squeezing cement into the dentinal canals and creating a space for the insertion of cement coated GP. This process is repeated until there is no more space for the spreader. GP and cement protrude from the access. The excess GP is cut level with the access with a scalpel blade or the heated beaver-tail end of a plastic filling instrument (PFI). The GP is pushed further into the canal with the rounded end of a PFI.
8. A radiograph is taken to ensure that the apex is sealed to the radiographically confirmed apex with no voids present, especially apical to the gutta percha apex. If it is not, the whole procedure should be repeated. Any debris left in the apex will continue to service the pulpal pathology. Unsealed dentinal tubules rapidly reintroduce bacteria into the canal; an incomplete apical seal will allow bacterial proliferation into the periapical tissues.
9. A small undercut is made in the dentine of the access hole and the excess GP and cement burred away from the cavity walls using a pear-shaped bur (size 330 or 331). If the access hole is already at an angle, an undercut is only necessary on the side opposite the undercut to produce a retentive cavity for the restorative material. The cavity preparation debris is flushed out and the access hole dried with oil-free pressurized air. If ZnOE was used as the canal filling cement and composite is chosen for the final filling, an 1 mm layer of hard-setting calcium hydroxide cement is placed over the ZnOE to separate the ZnOE and the composite. Since ZnOE prevents composite from setting.
10. If a calcium hydroxide sealing cement is used, the undercut is carefully burred to remove any excess calcium hydroxide cement form the cavity walls and the debris flushed away.
11. The final filling material is mixed, having prepared the tooth surfaces according to the manufacturer's instructions. It is packed into the prepared site, avoiding air bubbles and ensuring a perfect seal. Once set. The excess is removed and filling smoothed with a finishing bur or sandpaper disks and polished with rubber abrasives and if necessary, prophy paste.
Advertisement
Related Content
Advertisement


Latest CME


Advertisement
Advertisement
Trending on dvm360
1
Q&A: Managing anemia, appetite loss, and phosphorus in feline chronic kidney disease
2
Preventing lost dogs on July 4: Stress cues, safe spaces, and recall training
3
Conference Insider: Fetch Kansas City offers something special
4
Are your clients underestimating heartworm risk?
5