
|Articles|January 1, 2014
Chronic vomiting in cats: Pictorial pointers for diagnosis
Author(s)Gary D. Norsworthy, DVM, DABVP
What to look for when evaluating cats for small bowel disease as a cause of chronic vomiting.
Advertisement
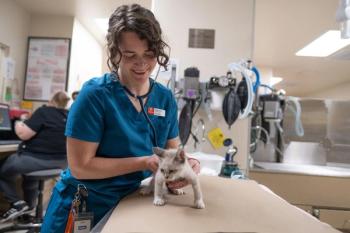
1: What counts as chronic. Chronic vomiting of food, hairballs, or both, is a common history for “healthy” cats. Chronic vomiting is defined as having a duration of greater than three months (often many years). In our practice, the threshold to recommend further diagnostics is vomiting twice a month or more.
2: Remember, grass doesn't count. Cats that eat grass will frequently, and often predictably, vomit. Grass vomiting is not counted for the purposes of chronic vomiting, as grass is a physical irritant to the stomach and can trigger vomiting in normal cats. Be sure to ask specific history questions on annual examinations and when evaluating sick cats.
3: The utility of ultrasound. Cats vomiting twice a month or more should undergo an abdominal ultrasonographic examination to evaluate the stomach and small intestine. This image shows a loop of small bowel with all layers clearly visible. We encourage the owners to be present during the ultrasound to include them in the diagnostic process.
4: Finding the right spot. On an ultrasonogram, the small bowel can be easily identified and measured in several places. An 11-MHz linear probe was used to obtain this image. Measurements are taken on freeze-frame images between peristaltic waves. Do not measure the entire diameter (brackets). Instead, measure the walls (dotted line).
5: Diagnostic guidelines. The wall thickness of the small bowel is measured from the outer surface of the serosa to the inner surface of the mucosa (the mucosa-lumen junction) (dotted line). Make at least five (and usually seven to eight) measurements of the small bowel wall. We define normal wall thickness as < 0.25 cm, abnormal as > 0.28 cm, and 0.26 to 0.27 cm as the grey zone.
6: Get a good look inside. For cats with two or more abnormal measurements of the small bowel, a laparotomy and full-thickness intestinal biopsies are recommended. During surgery, the bowel is run, palpated, and examined visually. Thickened or abnormal areas are selected for biopsy. Collect at least three small bowel biopsy samples. Note the difference in thickness of these two bowel loops.
7: Typically atypical. Some cats have pronounced segmental disease, meaning that some segments of the bowel are normal while others are abnormal. This image shows the typical unequal distribution of disease and also an enlarged mesenteric lymph node.
8: Preparing to sample the small bowel. Use a 6-mm punch biopsy to collect full-thickness biopsy samples of the small bowel wall. Depress the intestine with the side of the punch biopsy so the antimesenteric surface is flat, making the biopsy easier to perform.
9: Obtaining the sample. Just as in the skin, gently spin the punch in place until it cuts through the tissue. Take care not to damage the tissue on the mesenteric side of the intestine.
10: Ready for closure. The biopsy site has a smooth margined circular defect that makes closure easy and uniform. Note that occasionally you may need to trim away excess mucosa (although not in this patient).
11: All stitched up. Place three simple interrupted sutures (4-0 polydioxanone) full thickness (into the lumen) to close the biopsy site. Test the area for leaks by injecting sterile saline solution into the lumen of the small intestine with either side of the biopsy side pinched off.
12: The importance of a punch. A comparison of a biopsy sample obtained by a scalpel blade vs. a biopsy punch. Our pathologist commented with delight when he saw our first biopsy sample using the biopsy punch because the layers remained intact and joined to each other making interpretation much easier. These sections are a nice visual that ‘Good data in will lead to good data out.' For our patients, this means high-quality biopsy samples can lead to clear cut proper diagnoses.
13: Assess the liver and pancreas. To screen for concurrent disease in the liver and pancreas (and, therefore, triaditis), obtain biopsy samples of both the liver and pancreas during surgery. This image shows removal of the falciform fat pad to help in visualization and biopsy of the liver. Perform the liver and pancreatic biopsies first, and then obtain the small intestinal biopsy samples. Reinspect the liver and pancreas for hemorrhage before the abdomen is closed.
14: Getting a liver sample. An abnormal area of the liver is preferentially biopsied, as shown in this image. However, if the liver is homogenous as is usually the case, you can cut a wedge biopsy sample from an easily accessible edge of tissue using Metzenbaum scissors.
15: Liver sample closure. The liver biopsy site predictably hemorrhages, but a single simple interrupted or mattress suture can achieve hemostasis. If this is not effective, sterile hemostatic powder can be applied topically.
16: Know your pancreatic anatomy. A pancreatic biopsy is routinely performed using a 4-mm punch biopsy. Understanding pancreatic anatomy is important so that the pancreatic duct is avoided. This can be achieved by sampling the edge of the pancreatic tissue. Examine both limbs and biopsy an area that appears normal; however, in most cats the tissue is homogenous.
17: Getting a pancreatic sample. To collect the pancreatic biopsy sample, place a finger gently behind the pancreas. The pancreatic tissue is thin and typically cuts through easily, so delicate tissue handling with the biopsy punch easily yields a sample. Hemorrhage is uncommon, and digital pressure usually achieves hemostasis. Rarely, hemostatic powder is used.
18: What contrast radiography tells you, Part 1. Contrast radiography is used when an acute episode of vomiting causes you to suspect bowel obstruction. In this barium radiograph from a cat with a hairball obstruction, you can see the dye column stop in the small intestine where it reached the hairball. The stomach is also markedly distended.
19: What contrast radiography tells you, Part 2. A hairball was removed from the small intestine in the cat pictured in Figure 18. Histologic examination of biopsy samples of the intestine (taken aboral to the enterotomy site) revealed lymphoma. This highlights the importance of biopsy during hairball obstructive surgery; there is usually an underlying intestinal disease present.
<
20: What contrast radiography tells you, Part 3. This barium 150-minute radiograph shows diffuse hypomotility of the intestine with little to no peristaltic waves visible. This should be another red flag that ileus may be present. An ultrasonographic examination, and usually surgical biopsies, are indicated.
Advertisement
Related Content
Advertisement


Latest CME


Advertisement
Advertisement
Trending on dvm360
1
Survey identifies client education gaps in canine end-of-life care
2
VHMA names 2026 2026 Practice Manager of the Year
3
Paws and profits: adoro Pet Insurance names chief business development officer and other updates
4
Finding the right workplace culture as an LGBTQIA+ veterinary graduate
5