

|Articles|August 1, 2011
Management of selected mandibular and maxillary fractures (Proceedings)
Author(s)Peter Emily, DDS, DAVDC (Honorary)
There are many techniques currently employed for Mandibular fracture repair. They range from simple tape muzzle placement to various forms of invasive surgical reduction. Surgical reduction techniques include intra oral wire cerclage or ligation, osseous plating, inter medullary pining to extra-oral fixation appliances or combinations thereof.
Advertisement
There are many techniques currently employed for Mandibular fracture repair. They range from simple tape muzzle placement to various forms of invasive surgical reduction. Surgical reduction techniques include intra oral wire cerclage or ligation, osseous plating, inter medullary pining to extra-oral fixation appliances or combinations thereof. These techniques require special instrumentation and added investment in equipment. They require longer surgical time to perform with added trauma and subsequent postoperative discomfort to the patient. The major complication with invasive Mandibular fracture reduction is post reduction dental malocclusion. Most surgical reductions, especially those that employ external fixation or plating tend to displace the fracture segments when they are secured. The clinician must be able to evaluate the alignment and occlusion of the mandible throughout the procedure.
Most reductions have been performed while the patient is conventionally intubated. This prevents occlusal evaluation during reduction. The mouth cannot be closed to evaluate dental or occlusal alignment due to interference from the endotracheal tube. To insure proper dental occlusion, Mandibular fracture reduction must be performed with pharyngeal-tracheal intubation or intravenous anesthesia with appropriate monitoring and support. These protocols permit occlusal evaluation during reduction without obstruction of the dental arcades by an endotracheal tube. The clinician is then able to place the mandible into proper occlusion at all times during the procedure.
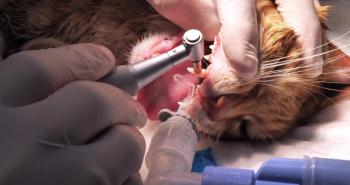
Mandibular fracture reduction can be accomplished without invasive procedures with the use of inexpensive dental materials. These include forming wax or a like boxing material such as caulking compound, orthophosphoric acid, (enamel etching gel), dental acrylic and the new non-exothermic, chemically cured temporary dental composite materials.
Procedure for acrylic splint construction
1. The entire oral cavity is flushed with a dilute Chlorhexadine solution. All open lesions if present, are debrided, thoroughly flushed and sutured.
2. The lower dentition is scaled and polished with non-fluoridated pumice, (flour pumice) rinsed and thoroughly air-dried.
3. The lower dentition is acid etched with orthophosphoric acid for one minute, thoroughly rinsed with water and air-dried.
4. Forming wax or caulking compound is placed 1/2 to 1 cm. below the marginal gingiva, forming a tightly adapted circumferential dam completely around the lower dental arch.
5. The upper dentition is coated with a petroleum jelly being careful not to contaminate the lower dentition with petroleum jelly. This would prevent retention of the acrylic.
6. Dental acrylic such as repair acrylic is dispensed as powder and liquid, (polymer and monomer) in the following manner. The liquid is first dispensed over the lower dentition and mucosa from a pipette or syringe followed by the powder usually dispensed from a plastic dispensing bottle. This in effect mixes the acrylic directly over the dentition and mucosa allowing the viscous mixture to flow into all possible undercuts and the etch surfaces of the enamel for retention.
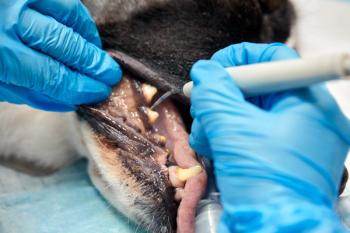
7. The placement of powder and liquid is repeated until the teeth and mucosa are covered with three to four mm of soft acrylic.
8. The tongue is rolled back into the throat removing the lateral borders of the tongue from dental interference. The mouth can now be closed with complete occlusal contact.
9. The mandible is completely closed into a positive correct occlusal relationship while the acrylic is still soft. This position is held until the acrylic has polymerized, usually within five minutes. Flowing warm water over the acrylic can accelerate polymerization.
Advertisement
10. After polymerization, the mouth is opened, the dam removed, and all rough edges of acrylic removed with an acrylic bur and slow speed hand piece or Dremel tool. This procedure produces a very strong positive locking splint that insures proper occlusal position throughout the reduction. The acrylic has received an exact indexing from the upper dentition while allowing for complete closure without premature contact from the acrylic splint.
a. The acrylic cast is carefully removed with an acrylic bur or sectioned with a small hand held blade. The teeth are polished with dental prophylactic paste and the soft tissue cleansed and flushes with a Chlorhexadine solution.
b. The acrylic split has formed a very rigid reduction mechanism that is non-invasive without postoperative malocclusion.
c. The difficulty with the use of acrylic for splint construction is the ability to confine the mixture to the occlusal surfaces of the teeth. The wax dams are difficult to keep in place. The acrylic mixture flows into the sublingual and muco-buccal areas of the mouth.
Procedure for the new dental composite resins
1. This procedure employs a simple mixing and delivery system.
a. The chemically cured dental composite is packages in a two-part canister - base on one side, and catalyst on the other.
2. The canister is loaded into a special syringe type delivery system called a Garant. When the Garant is activated with a trigger like method, a plunger forces the base and catalyst into an attached mixing tube. The composite is premixed and expelled out of the mixing tube.
3. The mixture is composite is deposited directly over the occlusal surfaces of the mandible similar to the mixed acrylic, the upper dentition is coated with Vaseline, and the mouth closed into proper occlusion as described for dental acrylic. This simplified delivery avoids the powder liquid mixing application of dental acrylic. The composite mixture is easy to confine to the teeth without the escape of the material into the surrounding tissues as seem with the acrylic method.
4. The shape edges of the curd composite are reduced with an acrylic bur and the indices of the upper dentition into the composite are relived. The relief of the idicies allows the patient to completely close the mouth much easier.
5. The patient is placed on soft food and for five to six weeks. Antibiotic therapy is prescribed for two weeks.
Avulsion and luxation
Avulsion and luxation is part of fracture management. Avulsion by definition is the separation of a tooth from its alveolus. Implantation of avulsed teeth is the return of the tooth into its alveolus. Complications of re-implantation include internal and external root resorption, ankylosis, inflammation, or tooth rejection
Procedure for re implantation
Prognosis is contingent upon the time the avulsed tooth has been out of the mouth. Most generally the avulsed tooth must be re-implanted within an hour. The time frame is rather vague. The danger is dehydration with subsequent loss of periodontal ligament viability.
The likelihood of root resorbtion and/or tooth rejection most certainly will occur after re-implantation of a dehydrated tooth with non-vital periodontal ligament fibers. The client calling with an avulsed tooth is instructed to quickly place the tooth in a cup of saline or milk. Milk has suitable osmolarity for the periodontal ligament cells.
Manipulation of root physically can damage the periodontal ligament. The tooth should be replanted as soon as possible. Root canal therapy treatment before re-implanting a tooth worsens the prognosis. Even more disastrous, scrapping or placing caustic disinfecting or other chemical on the root will further damage the prognosis. Caustic drugs kill the cementum site and coagulate the collagen fibers of the periodontal ligament. Intentional removal of the periodontal ligament is followed by excessive replacement resorbtion and ankylosis.
Neither pulp extirpation nor root canal filling with gutta percha should be performed before re-implantation. Immediate re-implantation and postponement of pulp extirpation and canal obturation is the preferred treatment for avulsed teeth. Root canal treatment, especially with calcium hydroxide obturation, should be performed no sooner than two weeks after re-implantation.
Canal fillings should be delayed until after splinting, not only to preserve the viable periodontal ligament remnants of the teeth when out of the mouth for long periods, but also to maintain the maximum healing potential of the socket. Under no circumstances should a retrograde procedure be employed before re implantation.
Luxation
Luxation is described as the dislocation of a tooth out its alveolus, as the result of trauma, or a pathological process. Most cases of luxation are absorbed by the periodontium, without apparent damage to the tooth structure.
There is a distinction between a subluxated tooth and a luxated tooth. Luxation includes extrusive, intrusive, and laterally luxated teeth. Subluxation injury is one that results in abnormal loosening of the teeth without displacement.
Luxation can result in degenerative ischemic changes. Subluxated teeth may have mobility, but usually they do not require splinting. In luxated teeth, the vascular supply to the periodontal ligament and into the root canal is usually severed.
The principals of treatment for luxated teeth are the same as for avulsed teeth, except the prognosis is usually better with luxated teeth. The chances for root resorption in luxated teeth are related to the severity of the luxation and the displacement. A passive splint is placed for one to two weeks. After two to four weeks root canal therapy is performed on the now non-vital luxated tooth.
Advertisement
Related Content
Advertisement


Latest CME


Advertisement
Advertisement
Trending on dvm360
1
Bobcat fever: Veterinarians emphasize year-round tick control for cats as cases climb in Oklahoma
2
Cat fleas in south Texas carry murine typhus pathogen, study finds
3
Mars recalls Pedigree dog food after allegedly diverted product reaches consumers amid foreign material risk
4
New World screwworm: What veterinary professionals need to know
5