

|Articles|May 1, 2005
Photo-intensive reports create impact, value in dental care
Author(s)Jan Bellows, DVM, DAVDC, DABVP, FAVD
Frequently, dental cases present to animal hospitals for treatment of halitosis. Daily tooth brushing, although a noble idea, is rarely practiced. Clients rarely see their pet's teeth. They bring their dog or cat to the veterinarian to have the teeth cleaned and polished. Hopelessly effected teeth are extracted without the client ever seeing the true extent of disease or areas of special attention for home care. Thanks to digital photography and inexpensive software, bringing your client into his or her pet's mouth is now within every practitioner's reach.
Advertisement
Frequently, dental cases present to animal hospitals for treatment of halitosis. Daily tooth brushing, although a noble idea, is rarely practiced. Clients rarely see their pet's teeth. They bring their dog or cat to the veterinarian to have the teeth cleaned and polished. Hopelessly effected teeth are extracted without the client ever seeing the true extent of disease or areas of special attention for home care. Thanks to digital photography and inexpensive software, bringing your client into his or her pet's mouth is now within every practitioner's reach.
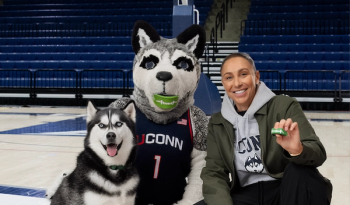
Photo 1: Encourage the client to pose smiling with the patient.
In our practice every dental case is documented and a picture report generated using digital photography. We start in the exam room with the smiling owner holding their pet closely. The technician takes over the digital responsibilities while the patient is anesthetized exposing clinical images of all quadrants, radiographs, probing depths, after-treatment documentation and final report generation. Necessary hardware includes the camera, printer and paper. Although any digital camera can produce diagnostic images, we have had success with Sony's Mavica series, Nikon Cool Pix 4300 with the SL1 ring flash, Fuji S2 pro with ring flash, Fuji S20 pro, and Kodak's Easyshare DX 6490 zoom digital camera.
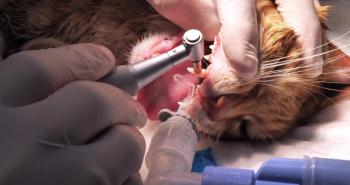
Photo 2: This technician uses a digital camera to expose the clinical appearance of the patients' teeth and gingiva under anesthesia.
The Easyshare is preset for dental photography equipped with a dental close-up lens that can be mounted easily for macro views. The beauty of the DX 6490 is its "point and shoot" ease. Little time is wasted figuring the ideal exposure and flash settings for close ups. Whichever camera you choose, make sure it has macro photography (flower) as well as black-and-white capabilities.
Photo 3: The right mandible reveals a missing first premolar.
A Pentium 4 computer with at least 512 RAM is recommended. High-quality report paper completes the hardware requirements.
Photo 4: This missing right maxillary first incisor can be documented for the client.
The software includes a program that can accept, manipulate, and store images from the camera, digital X-ray, and scanner. The ease of use of the program is as important as which camera you pick. I have found Photobase 4.5 (Arcsoft,
Photo 5: Digital picture of the radiograph showing a root fragment and periapical pathology.
Step by step:
- Take a pre-anesthetic picture of a patient.
The client and patient are usually happy and smiling during the intake appointment. This gives a great opportunity to document happy owners and patients. Try to get the patient and client's head as close as possible with eyes in the same horizontal plane (Photo 1). A face picture of the pet alone still adds impact to the report in those cases where the pet is dropped off in the morning and the client is not available for a picture.
Advertisement
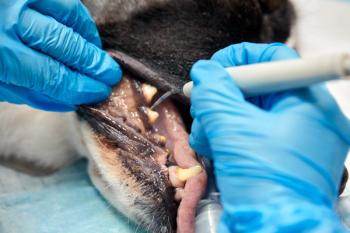
Photo 6: Technician takes a picture of the maxillary incisors.
Clinical survey images are taken
- All quadrants should be photographed unless there is a specific problem (fractured tooth, oral mass). The photographer should consider how the final printed image will appear to avoid imaging extraneous objects (endotracheal tube, gauze, fingers, mouth gag) (Photos 2, 3, 4.).
- If pocket depths are present, image the periodontal probe inserted.
Photo 7: Extracted tooth fragment image for the final report.
Post-treatment images
- Take photos of cleaning, extraction, mass removal, root canal therapy.
Clients really appreciate the before and after enlarged teeth cleaning images (Photo 12).
- Pictures of the radiographs are taken.
Dental radiography is essential in dental care. Radiographs of abnormal findings give the client black-and-white support of treatment decisions and the degree of disease. Digital radiographs can be downloaded directly into the software program when preparing the final report (Photos 5, 6, 7.).
- Upload images into Photobase®.
Photo 8: Upload digital images of the case.
Multiple digital cameras are used in our office to help keep track of several ongoing cases. Digital cameras are equipped with flashcards that hold images. The flash card is removed from the camera, inserted in the computer, and all images are downloaded into the Photobase file specifically earmarked for each patient (Photo 8).
Photo 9: Add text to identify the patient name and date.
Images are enhanced
The goal of the final report is to tell a story. What did the patient present with? What did diagnostic tests show? What was done, and how does the inside of the mouth look like after treatment? Tell the story with as few images as possible. Pick out the images to be included in the final report from those downloaded.
- Highlight the image and examine how it will appear in the final report. Most images will need easy cropping, adjustment of brightness or contrast before finalizing. Circles or arrows are added to show the client specifically where disease is present (Photo 9).
- Text is added to each image.
Each image is different. A few words to identify what the image represents helps the client understand what the picture represents (Photo 10).
- Set up the image order and determine the number of images per page.
The client/patient image is placed in the upper left corner, followed by the abnormal clinical radiograph, and finally post treatment image. Six to eight images per page is preferred. The larger the image, the more impact.
- Create header and footer.
Photo 10: The autofix component in photography editing software provides the best image.
We use the patient's first and last name as well as the client number (or date) for the header (top of the page), and the hospital name for the footer (bottom of the report).
Photo 11: Use the report to explain your findings and treatment to the owner.
Many practitioners either want to create a dental practice within their existing practices or increase what they already have. Adding visual dental reports will far exceed your expectations and those of your clients, too.
Photo 12: The owner's visual aid can be a valuable take-home tool.
Dr. Bellows owns Hometown Animal Hospital and Dental Clinic in Weston, Fla. He is a diplomate of the American Veterinary Dental College and the American Board of Veterinary Practitioners. He can be reached at (954) 349-5800; e-mail:
Advertisement
Related Content
Advertisement

Latest CME


Advertisement
Advertisement
Trending on dvm360
1
Tornado (the dog) touches down at the emergency department
2
Every 30 extra minutes under anesthesia raises complication risk in brachycephalic patients, underscoring the importance of peri-anesthetic management
3
Paws and profits: VetEvolve names first chief veterinary officer, NVA appoints two board members, and more updates
4
From the CVO: I’m off the clock
5