

|Articles|December 28, 2016
- December 2016
- Volume 1
- Issue 3
Extractions in the Real World
Author(s)Heidi Lobprise, DVM, DAVDC
After years of writing articles and chapters as well giving many lectures on extraction techniques, there are common questions I receive over and over again about diagnostics, equipment and surgical closure.
Advertisement
After years of writing articles and chapters as well as giving many lectures on extraction techniques, there are common questions I receive over and over again about diagnostics, equipment and surgical closure. Here are helpful hints and tips that address those concerns.
Radiographs: They Are a Necessity!
An AVMA/PLIT Professional Liability newsletter (Summer 2015) summarized three cases in which mandibular fractures occurred during the extraction process. Without dental radiographs, the insurance carrier and veterinarians agreed that the standard of care would be difficult to defend, and consented to settle the cases. In the same newsletter, Sharon Hoffman, DVM, ACVD (board-certified veterinary dentist) stated: “Without seeing the anatomy of the tooth roots and the mandibular bone, surgery (extraction) should not be attempted.”
In cases of feline tooth resorption (TR—formerly known as FORL—feline odontoclastic resorption lesions), radiographs are absolutely essential! If the periodontal ligament (PDL) space is intact and visible, or if there is any periapical bone loss, the entire root structure must be completely elevated. Modified extraction (crown amputation with intentional root retention) can ONLY be done if odontoclastic resorption has been proven with radiographs (loss of PDL definition, replacement of root with bone structure).
Of course, preoperative radiographs are essential for any extraction. An important aspect to evaluate will be the presence of the PDL space: if it is visible and distinct, then there is likely a ligament that can be fatigued during elevation forces. If there is no visible ligament space, then the tooth could be ankylosed or resorbing, and this would make extraction more challenging. These teeth may need more aggressive alveolar bone removal in order to loosen the root segments.
Equipment
A high-speed hand piece can be used with a variety of carbide burs for sectioning teeth, removing alveolar bone for access and finishing or smoothing the bony edges. Crosscut fissure burs are best for sectioning teeth, from the very slender #699 for cat and small dog teeth to #700 and #701 for larger dogs. Surgical length (#700L) with a longer cutting tip is helpful for sectioning maxillary fourth premolars. Round burs (small #1/2 to #2, #4 or larger) can be used to remove buccal bone for access for elevation or to make ‘ditches’ around a root tip for easier elevation. Diamond burs can be used to smooth the alveolar edges (osteoplasty) prior to gingival flap closure. (Figure 1)
Advertisement
For gingival flap elevation, periosteal elevators also come in a variety of sizes. Double-ended periosteal elevators can have a Molt #2 on one side and a Molt #4 on the other. Both ends are fairly small, thin spoon-shaped working ends. (Figure 2) A Molt #7 can also be used for larger flaps. Many dental elevators are winged, or cup-shaped, in a variety of sizes to fit the diameter of the root section being loosened. (Figure 3) Flat tipped elevators (sometimes called luxators) facilitate initial separation of the tooth from the alveolar bone, or help elevation on flatter tooth surfaces, such as the buccal or palatal aspects of maxillary canine teeth.
It is critical to keep the ends of the dental elevators (and periosteal elevators) sharpened on a regular basis. Dental elevators are most effective when the tip can be inserted into the PDL space between tooth and alveolar bone, so thick, blunt instruments are ineffective. Sharpness should be evaluated daily, and if a particular instrument gets dull during the procedure, additional sharpening may be needed intraoperatively, or a different sharpened instrument may be substituted. Sharpening techniques may vary, but the goal is to form a ‘knife-edge’ on either the outer or inner surface of the elevator blade. Eventually, as sharpening removes some structure, elevators must be replaced if the working end gets too thick.
Access
Unless the tooth to be removed is one-rooted and extremely mobile, taking appropriate steps to facilitate better access to the roots is worth the time and effort. In most multi-rooted teeth and canine teeth, designing a gingival flap for exposure is the first step. An envelope flap (stretching out the buccal mucosa without making vertical releasing incisions) may be sufficient for incisors, smaller premolars and the maxillary first molar in dogs. Releasing incisions at the rostral (mesial) or mesial and distal aspects of canine and carnassial teeth (maxillary fourth premolars and mandibular first molars). The vertical releasing incisions are made through the attached gingiva at the mesial and/or distal aspects of the tooth, and are extended a few millimeters in the looser alveolar mucosa past the mucogingival line. Be sure to fully excise through the gingiva at the corners, as the tissue is thicker and can be more difficult to elevate initially. A scalpel blade can be used to excise a millimeter or two of the gingival margin before elevation, to get a fresh epithelial edge before starting. The blade can also be carefully inserted into the sulcus or pocket to start the elevation. The periosteal elevators are used to detach a full thickness gingival flap, including the periosteum, from the surface of the alveolar bone. In most extractions, particularly with maxillary canine teeth, this periosteal sheet must be separated, cutting the fibers that keep the flap anchored to the underlying bone. Carefully cutting this layer on the underside of the flap can release the tension, so the flap can be sutured easily later.
Once the gingival flaps are elevated, alveolar bone can be removed to allow easier access to section multi-rooted teeth, or to remove sufficient bone to facilitate elevation of larger roots, such as maxillary canine teeth. A round or cross-cut fissure bur can be used to create ditches, or exaggerated periodontal ligament spaces at the mesial and distal aspects of the maxillary canine. These ditches are extended at least to the level of the widest portion of the root (some prefer to remove alveolar bone from the entire lateral surface of the root in difficult cases). Cut across the alveolar bone to connect the two ditches, forming a segment of alveolar bone that can either be removed separately, or with the tooth. (Figure 4) Sharpened, winged elevators can be advanced into these ‘ditches’ (be careful with any apically aimed forces with sharp instruments—don’t slip!), and rotated and held to start to stretch the periodontal ligament fibers. Flatter elevators can be used on the palatal surface (just don’t cause an oronasal fistula), or even to make sure the remaining buccal bone is separating from the tooth.
For extraction of the maxillary fourth premolar, a single mesial releasing incision may be sufficient to develop an “L” shaped flap, that will rotate with the corner to be sutured to the mucosa by the palatal root (once extracted). A distal flap can be made, but avoid damaging salivary duct openings. Remove enough alveolar bone that you can clearly identify the furcation, then use a cross-cut fissure bur (use the entire length of the cutting edge flat on the tooth for maximum contact area) to section the tooth from the furcation through the developmental groove, to separate the distal root from the two mesial roots. A second cut from the furcation aimed rostrally will remove a wedge section of the crown that will expose the distal aspects of the two mesial roots and their distal furcation. (Figure 5) This step can really help your efforts to separate the two mesial roots completely, which can be challenging. The cross-cut fissure bur can also be used to carefully shave off the distal aspect of the distal root (don’t damage the first molar), providing space for dental elevators in an area that is usually crowded against the first molar.
Once these three roots are completely separated, they are smaller, more conical root segments, and simple elevation should be sufficient. At times, the palatal root is more challenging to remove, and using the alveolar bone that was between the palatal and mesiobuccal roots can be used for better leverage. If the crown breaks off, you can use a round bur to remove bone around the remaining root, again creating a ditch for elevators. Just be careful using too much force apically—you don’t want the root to slip into the nasal sinus!
Closure
If you developed a good flap, the buccal gingiva/mucosa should be ready for suturing without tension. Elevate the lingual or palatal mucosa off the inner aspect of the extraction site, trimming away any diseased tissue. This allows better exposure for finishing alveoloplasty, and will facilitate passing the needle through the tissue. I prefer placing the needle through the palatal or lingual mucosa first, then going through my buccal flap. Secure corners of the flap first, to provide the best flap placement, and close the remaining edges. For dogs, a reverse cutting needle with 4-0 monofilament suture material can be used, and 5-0 monofilament on a cutting taper needle is an option for cats and small dogs.
Summary
Extractions can be challenging and frustrating, but by using the correct, SHARPENED instruments and following basic steps, you can avoid some common pitfalls.
Dr. Lobprise is a veterinary dentist and a diplomate of the American Veterinary Dental College (AVDC). She earned a doctorate of veterinary medicine at Texas A&M University’s College of Veterinary Medicine. Her areas of special professional focus include dentistry and senior care.
Articles in this issue
over 9 years ago
The Use of Hyperbaric Oxygen Therapy in Small Animal Medicineover 9 years ago
Canine Socialization: More Than Meets the Eyeover 9 years ago
Trained Therapy Animals Boost the Moods of Cancer Patientsover 9 years ago
Changes in 2016 Set the Stage for Exciting 2017over 9 years ago
Dealing with Fleasover 9 years ago
Delinquent Clients: The Price of Compassionate Care?over 9 years ago
Cranial Cruciate Ligament Injuryover 9 years ago
Factors That Adversely Affect Reproductive Success in Maresover 9 years ago
Growing Gains, Not PainsAdvertisement
Related Content
Advertisement


Latest CME


Advertisement
Advertisement
Trending on dvm360
1
FDA issues emergency use authorization for ivermectin solution to prevent screwworm in horses
2
Cyclospora and pets: Reservoir, bystander, or red herring?
3
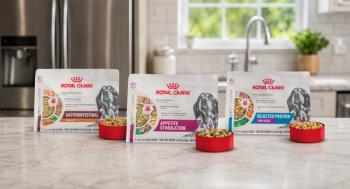
Royal Canin launches its first fresh therapeutic diet line for dogs, available only through veterinarians
4
Surgeons perform first reported mastoidectomy on a gorilla at San Diego Zoo Safari Park
5