

News|Articles|August 26, 2016
7 critical things to check in a new veterinary build
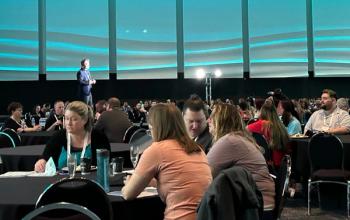
Please, PLEASE check these. Architect Heather Lewis at the Veterinary Economics Hospital Design Conference shared these with us at CVC Kansas City.
Advertisement
"Everything won't go right, but you can get 98 percent of them right," said veterinary architect Heather Lewis to a packed house at this year's Veterinary Economics Hospital Design Conference. "Don't focus on small imperfections. Focus on your life and work."
But before she shared that heartwarming advice, she dropped seven truth bombs on not-small imperfections.
1. Review the floor drains before the slabs are poured
You have a plan for where cat and dog waste and the water and cleaning solutions that wash it away will flow away in runs, wards or kennels. If there are mistakes in placement and your concrete slabs are poured and solid ... well, that's a heck of a change order to pay for, people.
2. Review the rough layout before the interior walls are closed up
You have good reasons for where your interior walls are. If some of the bones of those walls are set but movable, they won't be movable after the drywall and everything else is laid into them. Stop the mistakes while these walls are see-through.
3. Review your flooring samples before the floors are fully installed
"If you're paying $12 or more per square foot for a great floor, and you have the 'B' team install, that's going to look pretty bad," Lewis said.
Advertisement
Look at the flooring when they start the install. Make sure you don't skimp on the folks laying it down.
The pain felt by some attendees in the room about the flooring they'd suffered with was palpable: bad installs, bad seals, cleaning made impossible by mistakes.
4. Review outlet placement before equipment is installed
Don't let them put these in dumb places, like behind a cabinet drawer. (We're not kidding you. Lewis had a picture.)
5. Respect the punch list
Last call for contractor fixes! The punch list is the document where you note any and all fixes that need to happen before the contractor gets his or her last payment for the work.
"The punch list is a time when architect, contractor and owner decide what deficiencies are left on the project," Lewis said.
If a client is really particular-every paint edge is perfect or ELSE-Lewis said she walks around with the contractor beforehand and takes care of that so the punch list focuses on extra-important, final fixes: appliances not installed, cabinet doors not installed, the occasional "paint goober" on the wall, a loose hinge.
She also reminded the audience what's a reasonable expectation. "You have to be able to observe the problem 10 to 15 feet away," Heather said, demonstrating by leaning down and staring at a table an inch away for what not to do.
6. Focus on new-systems training-or film it for later
Does everyone know how the new HVAC system works? If you don't have time to do it all when you move in-"your eyes may be glazed over when they try to tell you how the thermostats work," Lewis said-film or document it for later. Someone will need to know sometime. Maybe not opening day ... but sometime.
7. Finalize with the job close-out
Understand your warranties. Verify the last bits of work from the punch list. Feel good about releasing the final payment retained for the contractor.
"That's the last bit of money to make sure the contractor comes back to fix the punch list," Lewis said.
Lewis' last advice? "Don't forget to have fun, whether you're the client or the contractor."
Advertisement
Related Content
Advertisement


Latest CME


Advertisement
Advertisement
Trending on dvm360
1
Every 30 extra minutes under anesthesia raises complication risk in brachycephalic patients, underscoring the importance of peri-anesthetic management
2
FDA issues emergency use authorization for ivermectin solution to prevent screwworm in horses
3
From the CVO: I’m off the clock
4
Paws and profits: VetEvolve names first chief veterinary officer, NVA appoints two board members, and more updates
5