

|Articles|August 1, 2011
Successful closure of oronasal fistulae (Proceedings)
Author(s)Peter Emily, DDS, DAVDC (Honorary)
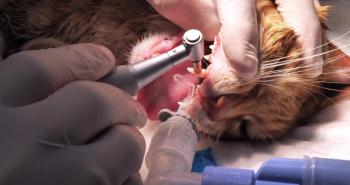
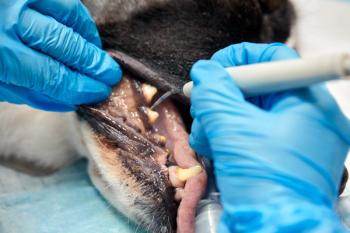
Oronasal fistulae (ONF) are communicating tracts between the nasal cavity and the mouth. The patient presents with continual nasal drainage of fluids and mixed particles of food discharged through the nose.
Advertisement
Oronasal fistulae (ONF) are communicating tracts between the nasal cavity and the mouth. The patient presents with continual nasal drainage of fluids and mixed particles of food discharged through the nose.
Etiology is commonly associated with severe periodontal disease and failure of primary flap closure after exodontia. Other etiologies include neoplasia, avulsion and maxillary fracture, however ONF secondary to extraction is by far the most common etiology. The most commonly effected teeth are the maxillary canines and fourth premolars; however, oronasal fistula can occur from the loss of any upper teeth. ONF is common in smaller breeds, e.g. Dachshunds, Yorkshire Terriers, and Poodles.
Mechanical turbinate exposure is commonly encountered during exodontia. Flap closure after tooth removal must adhere to two essential principals of oral flap management. First, the flap must be tension-free, and secondly, the suture line must not be placed over the surgical defect. Any violation of these principals will result in flap failure.
Existing fistula present with a pressure that varies between the nose and the mouth that perpetuates the patent fistula. Closure is effectively accomplished by a double-sliding flap utilizing the palatal gingiva and the alveolar mucosa adjacent to the defect.
Double flap closure
This is a highly successful and proven technique. The procedure is as follows:
1. The presence of acute infection, an assessment of the patient's general health, and the tissue surrounding the fistula must be deter-mined before surgery. The presence of bacteria, particularly haemolytic Staphylococcus, Streptococcus or Bacteroides species, greatly impairs surgical remission. Bacteriological culture and sensitivity and an effective course of antibiotics and home care are prescribed for ten days to two weeks to render the fistula as bacteria-free as possible prior to surgical closure.
2. A full-thickness mucoperiosteal flap is raised from the palate medial to the fistula. The incision line begins slightly rostral and medial to the defect, progressing to a medial point approximating to the width of the defect. It is better to harvest too much than too little tissue. The incision turns caudally, parallel to the labial aspect of the fistula. At the level of the caudal extremity of the defect, the incision turns labially and runs to the caudal edge of the defect.
Advertisement
3. A sharp periosteal elevator is used to raise the full-thickness mucoperiosteal flap from the underlying palatal bone as far as the edge of the fistula. Do not push the elevator through into the fistula.
4. The lateral margin of the fistula is scarified. The surface of the epithelium is scraped from a strip 2-3 mm wide, using a scalpel blade (or an abrasive disc, with care).
5. The flap is turned upside down so that the oral epithelium is turned to face the turbinates. The flap should lie in place without tension. If it does not, further elevation is performed ensuring that the flap is not punctured.
6. A partial-thickness flap, approximately 1 mm thick, is raised lateral to the defect. The incision begins at the caudal edge of the fistula, 2-3 mm lateral to the defect, at the edge of the scarified strip. It runs parallel to the lateral margin of the fistula, 2-3 mm laterally, along the edge of the scarified strip, to a point rostral to the fistula. This determines the length of the flap, which must reach the most medial exposed area of the palate, without tension. Again, too much tissue is better than too little. The incision line is then taken laterally a distance equal to the width of the palatal donor site, then caudally, parallel to the lateral margin of the fistula, as far as the level of the caudal extremity of the fistula.
7. The finger flap is raised, 1 mm thick, with a new scalpel blade, taking great care not to puncture it. It is rotated medially over the upside-down palatal flap and its donor site, totally covering both. It is temporarily lain back on its donor site while the palatal flap is secured.
8. The primary, palatal flap is sutured in place, upside down, completely covering the defect. Single simple interrupted sutures of absorbable material swaged onto a cutting needle are placed close together, totally closing the fistula. The lateral extent of the flap can be sutured to the labial plate of alveolar bone with two or three sutures for additional security if so desired. A tightly sutured, tension-free, primary flap which completely covers the fistula should be accomplished.
9. The secondary, partial-thickness, finger flap is sutured over both the primary flap and the primary flap donor site with absorbable suture material. It is essential that all epithelial surfaces to be covered have been scarified and their epithelial surface removed; tissue will not heal onto intact epithelium.
10. The secondary flap donor site is closed by suturing the lateral and medial edges together with absorbable suture material.
11. Continuation of the course of antibiotics is advisable. Soft food is recommended for 2 weeks post-operatively.
This technique produces a double flap closure where the oral epithelium of the palatal flap is inside, adjacent to the nasal turbinates, and the lateral mucosal epithelium of the covering, secondary flap remains outside, in the oral cavity. Properly executed, this produces consistently effective fistula closure.
Modification for gingival recession or alveolar bone loss
Where there is gingival recession exposing alveolar bone, or loss of labial alveolar bone, exposing the nasal turbinates, the same technique is used but with the following modifications.
• Step 2 The palatal flap is larger, so that the entire exposed area can be covered.
• Step 4 The attached gingiva and palatal tissue are scarified, but the alveolar mucosa is not, because the alveolar mucosa forms the finger flap.
• Step 6 When raising the mucosal finger flap, its shape is adjusted to allow for the area lost as a result of gingival recession.
• Step 8 The primary flap is shaped to fit the fistula. It is wise to make the flap a little too large; it will wrinkle to accommodate the extra tissue. If the flap is too small, it cannot be secured without tension, and the procedure will fail.
• Step 9 The palatal flap is compressed into the site of gingival recession. Its position is adjusted to ensure that the primary flap is completely covered, despite the area of mucosa lost as a result of gingival recession.
Advertisement
Related Content
Advertisement


Latest CME


Advertisement
Advertisement
Trending on dvm360
1
Every 30 extra minutes under anesthesia raises complication risk in brachycephalic patients, underscoring the importance of peri-anesthetic management
2
FDA issues emergency use authorization for ivermectin solution to prevent screwworm in horses
3
From the CVO: I’m off the clock
4
Paws and profits: VetEvolve names first chief veterinary officer, NVA appoints two board members, and more updates
5