
|Articles|April 18, 2016
Staples of stomach surgery
Author(s)Hilal Dogan, BVSc, CCTP
Practical pointers from a hands-on course on performing common gastrointestinal surgeries.
Advertisement
In veterinary school, it seemed to me that entering the abdominal cavity of an animal for a surgical emergency was like Frodo and Samwise trying to enter Mount Doom. You just don't know whether they are going to come back out alive. The Essential Gastrointestinal Surgeries in Dogs clinical techniques course at the CVC was exactly what I needed to conquer my fears! I learned how to perform an incisional gastropexy, a gastrotomy, an enterotomy and an end-to-end anastomosis. I even put in an esophagostomy tube, which always just looked like a Gandalf-worthy magic trick to me until I was able to practice it on my own. Matthew Keats, DVM, DACVS, simplified instructions for each procedure. Here are some tips and tricks I picked up that might help you the next time you venture into the GI system.
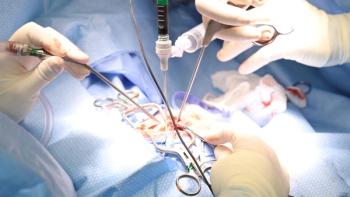
Looking for guidance in performing common gastrointestinal surgeries? Let's dig in! (Photos from the CVC Essential Gastrointestinal Surgeries in Dogs clinical course, by Gregory Kinded)General principles to remember throughout your journey
- Always reference your surgical and anatomy textbooks or your reference of choice and plan ahead! You can't find your way without a road map.
- Always go in the order of clean to dirty, change your gloves and instruments, and don't forget: the solution to pollution is dilution (local lavage and suction is the best way). It's never wrong to change gloves multiple times during surgery.
- If you don't have radiopaque sponges, then never place a sponge inside the patient.
- Keep fluids warm in an incubator. Do not use a microwave since it heats unevenly and can cause severe burns.
- Keep tissues moist to protect them and make handling less traumatic. Dry tissue makes it harder to close the skin as it is prone to drying and sticking to the subcutaneous fat. All tissues should be kept moist and may need periodic remoistening. Having an assistant keep tissues moist is best.
- Grab delicate tissues with your needle, not the forceps.
- Grab the subcutaneous tissue rather than the skin. Additional trauma to the skin causes more inflammation and, thus, chance of infection.
- Use instruments instead of fingers whenever possible; it will cause less trauma.
- Nausea is common with gastrointestinal disease or surgeries, so antiemetics preoperatively and postoperatively are a good idea, when not contraindicated.
- Remember Halsted's principles of surgical technique:
- Minimize tissue trauma.
- Practice precise hemostasis.
- Preserve the blood supply.
- Use aseptic technique.
- Minimize tension on the tissue.
- Use accurate tissue apposition.
- Obliterate dead space.
Entering the belly of the beast
- Remember the stomach is a friendly organ to operate on. It's mobile and has excellent healing abilities.
- Avoid the pyloric area during surgery if you can since the blood supply to the pancreas and the common bile duct is nearby.
Advertisement
- Get Balfour retractors. It will make your life so much easier since they are self-retaining. You don't have to use the locking ones, but always be familiar with all your instruments (parts and pieces too, in case you are missing a piece).
- Put moistened laparotomy sponges down first to contact the serosa and then dry ones on top and adjacent to bowel to be opened as needed to absorb contamination. Isolate the stomach with laparotomy sponges.
- Use stay sutures or atraumatic forceps at the end of the proposed incision.
- Stomach incisions are generally made on the ventral surface between the greater and lesser curvatures.
Concentrated learning.Some specifics on gastrostomies
A quick overview of a gastrotomy procedure:
- Make a stab incision at the ventral body of the stomach.
- Enlarge the incision with sharp scissors. Metzenbaum scissors are best, and don't forget to get your instruments serviced periodically, depending on use.
- Explore the stomach as indicated.
- Take full-thickness biopsy samples if indicated.
- Note that mucosal eversion is normal and occurs readily.
- Closely inspect the deep area of the fundus for foreign bodies as well as the pylorus and cardia.
- Be prepared to suction and use a Poole suction tube.
- Place an orogastric stomach tube to reduce contamination once the stomach is opened.
Some notes on wrapping up and incision closure:
- Always obtain postoperative radiographs for documentation of lack of retained surgical objects or radiopaque foreign bodies, realizing that nonradiopaque sponges are essentially undetectable with radiographs.
- Before closing, always look for foreign bodies and surgical objects or instruments throughout the gastrointestinal tract.
- In patients with low albumin concentrations or other concerns for debility, use a long-acting absorbable suture such as polydioxanone.
- Try to get a mucosal seal (by apposition).
- Using 3-0 to 4-0 polydioxanone suture, close the gastric mucosa and submucosa in one layer by apposing or slightly inverting the sides of the incision and using a simple continuous pattern. REMEMBER TO ENGAGE the submucosa as it is the holding layer. Then close the seromuscular layer in a continuous inverting pattern (typically a Cushing suture pattern).
- If you're using stay sutures, make sure the incision does not have tension on it when you are closing the stomach because when you let go of the stay sutures your closure will be loose.
- After you close the stomach, flush the top of the site where you have your stay sutures with saline solution and check for leaking as you place the stomach back into its correct anatomical position back with your stay sutures still on so you can pull it back up quickly if leaking.
- Hospitalize the patient for 24 hours for pain management and fluid therapy with gastroprotectant and antiemetic administration as necessary.
- You can start feeding as soon as the patient is normotensive, normothermic and awake. Nausea is often underdiagnosed because animals can't speak. If a patient is not eating, consider antiemetic administration.
- Do NOT administer NSAIDs postoperatively.
- If the patient is very painful 24 to 48 hours postoperatively, be very suspicious of something else going on.
It's as simple as that?How to surgically handle GDVs
A gastropexy is indicated when gastric dilatation-volvulus (GDV) has occurred and has been surgically corrected or can be performed prophylactically to prevent GDV. This procedure prevents malpositioning of the stomach and is permanent and safe.
After stabilizing the patient with aggressive fluid resuscitation and any other appropriate treatments, administering analgesics, confirming your diagnosis, and doing your diagnostics quickly, here's where the surgical battle begins!
1. Perform decompression (after the fluids!) either via orogastric intubation with the patient anesthetized and safely intubated OR via a percutaneous decompression. The latter is best in a patient that cannot breathe. There is a risk of hitting the splenic artery percutaneously, so don't use this method unless you have to. If you can't pass an orogastric tube, then do percutaneous decompression and try the orogastric tube again.
2. Perform surgery.
- First reposition the stomach-counterclockwise to de-rotate. This is typically easier from the right side of the table.
- Assess stomach viability and damage.
- Resect any devitalized gastric tissue, if necessary (this is very difficult to do by yourself because of contamination).
- Evaluate the spleen for malpositioning, devascularization and thrombosis.
- Dr. Keats prefers an incisional technique for gastropexy since it's relatively easy and safe.
- Remember you can palpate the “slipping” of the layers of the stomach. Separate the seromuscular layer from the mucosa and submucosa. This is especially valuable for gastropexy as you do not want to make full-thickness incisions.
- Count your arcades starting from the pyloric antrum on the ventral aspect (1,2,3) coming off the greater curvature and that's where you do your gastropexy incision. Dr. Keats typically counts the branching vessels (right gastroepiploic) as they emanate from the greater curvature starting just proximal to the pylorus and proceeding orally and centers the incision around that third arcade.
- Release abdominal wall incision traction or close the Balfour retractor; this will allow anatomical apposition of the two sites.
- Identify incision sites clearly and match them.
- Use tissue forceps to evert the body wall.
- Feel for the slip of the mucosa and submucosa falling away from the intended incision site AGAIN.
- For your stomach incision, make a seromuscular incision (only cut into the first layer; the second layer should bulge out) about 2 to 2.5 times longer than the width of the pylorus (4 to 5 cm).
- On the body wall, don't go too dorsally, but stay ventral since it's more anatomic-2 to 4 cm lateral to midline and 2 to 4 cm behind the last rib. Incise the peritoneum and transversus abdominal muscle. A common mistake is to make this location more dorsal due to visibility but this can malposition the stomach.
- For closure, 2-0 polydioxanone suture in a simple continuous or interrupted suture pattern is typically used. Be sure to suture deep to superficial-the dorsal side first from the cranial end-and use long-acting absorbable suture. Dr. Keats prefers polydioxanone suture.
Hilal Dogan, BVSc, is an associate at At Home Animal Hospital in Maui, Hawaii. She started the
Advertisement
Related Content
Advertisement
Latest CME


Advertisement
Advertisement
Trending on dvm360
1
Tornado (the dog) touches down at the emergency department
2
Every 30 extra minutes under anesthesia raises complication risk in brachycephalic patients, underscoring the importance of peri-anesthetic management
3
Q&A with an emergency veterinarian on critical care and common ER misconceptions
4
Paws and profits: VetEvolve names first chief veterinary officer, NVA appoints two board members, and more updates
5