

|Articles|April 1, 2009
Arts and crafts in veterinary dentistry: The tape muzzle (Proceedings)
Author(s)Jeanne Perrone, CVT, VTS
As members of the veterinary team, there have been instances where you have had to fix things using materials out of the hospital.
Advertisement
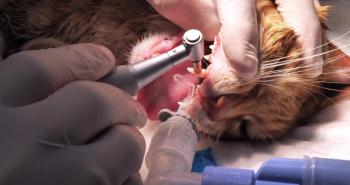
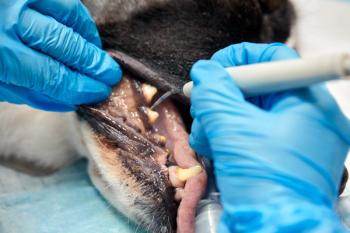
As members of the veterinary team, there have been instances where you have had to fix things using materials out of the hospital. In this day and age, that would be seen as eco-friendly. What this lecture will be focusing on is the application and construction of the tape muzzle. The tape muzzle has many uses in jaw fracture repair. They are used to keep the jaw stabilized and keep the teeth in occlusion while the jaw is healing.
Conditions That Merit the Use of Tape Muzzles
Emergency triage – tape muzzles can be placed on the patient once admitted to the hospital to prevent displacement of the fracture until the fixation procedure can be performed. This would be contraindicated in patients that were vomiting, have pulmonary injuries, or are in respiratory distress.
Mandibular fractures – if the fracture is unilateral, with minimum displacement, a tape muzzle can be used for stabilization. Due to the rich blood supply in the oral cavity, this area does not need a rigid fixation in order to achieve adequate healing. During the healing process, a larger callous may be seen in areas that are not totally immobilized. In mandibular ramus fractures or minimally displaced condyloid process fractures, due to the muscular support in this area of the mandible, the tape muzzle can provide additional support.
Pathologic fractures due to periodontal disease – in these cases, other methods of fixation are not possible due to the disease present. Complete union of the sections is not likely even with regeneration therapy. The stability that the tape muzzle provides can allow fibrous union to form.
Tape Muzzle General Information
Advertisement
Tape muzzles are contraindicated in brachycephalic breeds because they rely on open mouth breathing for efficient respiration. Tape muzzles are also contraindicated in patients that are vomiting or are in respiratory distress.
The loop that is around the muzzle of the patient should be loose enough to allow the patient to lap up soft food, water, and be able to pant. The interdigitation of the canine teeth keeps the mouth from having lateral movement
Fabric muzzles, with careful fitting that support the mandible can be used. Since multiple muzzles need to be dispensed, this could prove cost prohibitive to the client. The clinic would also need to keep a stock of all sizes at all times. Depending on the design of the fabric muzzle, a portion of the maxillary support may need to be cut away to prevent rubbing which could lead to skin maceration.
Construction of the Tape Muzzle
Equipment needed – stock bottles from around the hospital, 1"and 2" adhesive tape
Step 1 – using stock bottles from the practice, place a stock bottle nose to bottle end. Choose a bottle whose diameter would allow the patient to open their mouth 0.5 -1.0 cm. Then choose a bottle whose length would be from midpoint of the nose to just behind the ears.
Step 2 - using the bottle that measured the nose diameter, choose either the 1" or 2" adhesive tape based on what would fit the patient comfortably just behind the canine teeth to the 4th premolar. Wrap the tape sticky side out around the bottle. Remove the tape ring from the bottle and place on the patient. Size the ring to allow the patient to open their mouth 0.5 to 1.0 cm. Once sized complete the ring by laying another piece of tape sticky side down around the ring.
Step 3 – place the ring on the table as it would be on the patient's nose and place the bottle that was used to measure the length of the head end to end. Take a piece of 1" tape and wrap the tape from the cranial edge of the tape ring around the back of the bottle to the cranial edge of the tape ring on the other side. Leave a little extra tape to make adjustments. Trial-fit the muzzle and make adjustments to the length. The muzzle length should fit just behind the ears to keep the ring from sliding off the nose. Once the adjustment has been made, take a second piece of tape and place it along the inside surface of the tape you just measured incorporating the muzzle ring.
Step 4 - trial-fit the muzzle again and make adjustments. If the ring is cutting into the skin near the eyes, you can make small curved cuts on the ring to bring the tape away from that area. Make sure the muzzle allows the patient to open the mouth enough to lap up water and soft food and to pant. This tape muzzle becomes your template. Repeat the process and make 2-3 more muzzles. Make sure each muzzle fits the same way.
Step 5 – put on the muzzle making sure the canine teeth are correctly occluding.
Management of the Tape Muzzle
After each meal, the muzzle must be removed and cleaned wiping it down with a soapy sponge and following up with a wet towel. Once the patient's face has been cleaned and dried, replace with a clean dry muzzle. Rotate the spare muzzles.2 Make sure to check the skin around the tape muzzle for signs of swelling, dermatitis or skin maceration. Rechecks of the fracture site should occur every 3-4 weeks with radiographs to monitor progress.
Conclusion
The tape muzzle can be used in some cases as the sole method of jaw fracture fixation or provides extra support if wiring and/or splinting procedures are performed. Having the skills to make and manage tape muzzles is an important asset to any practice where jaw fracture repair is performed. Once the template muzzle is made for the patient, multiple people can sit in and make the extra muzzles. This will speed up the process.
Advertisement
Related Content
Advertisement


Latest CME


Advertisement
Advertisement
Trending on dvm360
1
Veterinary Emergency Team in Texas deploys in response to NWS cases
2
Survey highlights gaps in canine pruritus management expectations
3
USDA approves canine vaccination for Lyme disease and leptospirosis
4
Dermatology health and the microbiome: How they interact for healthy skin from within
5