Surgery STAT: Don't forget nutrition! Placing esophagostomy tubes in cats
This simple procedure ensures adequate nutrition for postsurgical feline patients-which can speed recovery time and minimize hospitalization.
Adequate nutritional support is an essential, yet often overlooked, aspect of postsurgical care. Ill patients frequently present with decreased appetite, anorexia or weight loss related to their underlying condition. These signs may be related to pain or structural disease of the mouth (e.g. oral tumors) or generalized feelings of illness due to systemic disease (e.g. lymphoma, renal disease).
The negative effects of malnutrition are well-established and include decreased wound and fracture healing, decreased immune response and organ dysfunction. Enteral nutrition can hasten recovery time, decrease hospitalization stays and avoid unwanted sequela such as hepatic lipidosis.
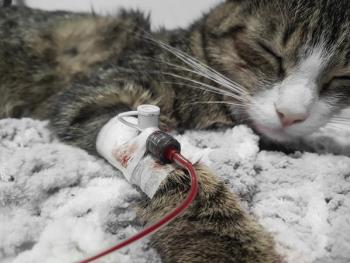
Esophagostomy tube placement in cats is a technically simple procedure, requiring minimal anesthetic time, and it carries a low risk of complications. Furthermore, esophagostomy tubes have a larger diameter than nasoesophageal or nasogastric tubes, allowing for administration of blenderized diets and medications. Compared to gastrostomy or jejunostomy tubes, esophagostomy tubes can be easily removed at any point.
Required equipment
Here's what you'll need to place an esophagostomy tube in a cat:
- Surgical preparation materials: clippers, scrub, sterile gloves
- Scalpel blade
- Curved hemostatic forceps
- Red rubber, silicone or polyurethane tube (minimum 10-F; often greater than 14-F-depends on size of patient)
- Tube adapter (i.e. “Christmas tree”) and injection cap
- Nylon suture
- Bandage material.
Patient considerations
Esophagostomy tubes are placed under general anesthesia. Consider the anesthetic risk to the patient and perform appropriate preanesthetic diagnostics as necessary. Patients with esophageal disease are not candidates for esophagostomy tubes.
Patient preparation
Anesthetize the patient with endotracheal intubation. I personally prefer to place the patient in right lateral recumbency so I can place the esophagostomy tube on the left side of the cervical region; however, the tube can be placed on the right side of the neck if necessary. Clip and prepare the region in standard fashion (Figure 1).
Figure 1. Preparation of the surgical site. All photos courtesy of Dr. Marc Hirshenson.Procedure
1. Premeasure the tube from the midcervical region to approximately the sixth to 10th rib space. Marking the tube with a marker can help you insert the tube to the appropriate level.
2. Cut the end of the tube to remove a blind end, if present.
3. Insert hemostatic forceps into the oral cavity, down to the cervical esophagus (Figure 2).
Figure 2. Insert hemostatic forceps into the oral cavity, down to the cervical esophagus.4. Palpate the hemostatic forceps dorsal to the jugular vein and use the blade to incise through skin and esophagus over the tips of forceps.
5. Open the hemostatic forceps tips to grasp the distal portion of the tube (Figure 3). Pull the tube through the esophagus and out through the oral cavity (Figure 4), leaving the proximal portion of the tube exiting from the cervical incision.
Figure 3. Open the hemostatic forceps tips to grasp the distal portion of the tube.
Figure 4. Pull the tube through the esophagus and out through the oral cavity.6. Redirect the tip of the tube back into the oral cavity and distally into the esophagus as far as possible, using your fingers or tips of the hemostat (Figures 5 and 6). Gently pull on the distal end of the tube; you'll feel a “flip” of the tube into a caudal direction within the esophagus.
Figure 5. Redirect the tip of the tube back into the oral cavity and distally into the esophagus as far as possible using your fingers or tips of the hemostat.
Figure 6. Redirect the tip of the tube back into the oral cavity and distally into the esophagus as far as possible using your fingers or tips of the hemostat.7. Adjust tube placement to the predetermined length.
8. Secure the tube using nylon suture with a finger trap pattern (Figure 7) and cap the tube. Combine with a purse-string suture if that's your preference.
Figure 7. Secure the tube using nylon suture with a finger trap pattern.9. Perform a lateral radiograph to ensure placement to the appropriate rib space and place a cervical bandage to cover the tube insertion site.
Postoperative care
Blenderized canned commercial diets can be administered through the tube once the patient is fully awake. Start feedings at 25% of caloric requirement per day (divided into four to six feedings per day) for the first day, increasing in 25% increments each day until the daily requirements are met. Many medications can also be administered if the tube is large enough in diameter. Administer a small volume of warm water (5 to 10 ml) before and after each feeding.
Complications
Complications are uncommon but include vomiting, stoma irritation and inflammation, clogging of the tube and infection.
Conclusion
Esophagostomy tubes are relatively simple to place and are essential for those patients where prolonged inappetence is anticipated. If necessary, they can be left in place for several months. In my own experience, most owners find tube feedings and management uncomplicated.
Dr. Marc Hirshenson is a board-certified veterinary surgeon practicing at Triangle Veterinary Referral Hospital in Durham, North Carolina. Aside from his experience with minimally invasive surgery, his professional interests include surgical oncology, wound management and cruciate ligament disease. In his spare time, he enjoys running, swimming, relaxing on the beach and traveling with his wife.
Surgery STAT is a collaborative column between the American College of Veterinary Surgeons (ACVS) and dvm360 magazine. To locate a diplomate, visit ACVS's
Newsletter
From exam room tips to practice management insights, get trusted veterinary news delivered straight to your inbox—subscribe to dvm360.


