

|Articles|October 1, 2011
Stages of periodontal disease (Proceedings)
Author(s)Johnathon R. Dodd, DVM, FAVD, DAVDC
With periodontal disease being one of the most prevalent diseases in pets, the opportunity to provide optimum oral health for patients is a practical goal for most veterinarians. By applying basic knowledge of the anatomy and progression of periodontal disease and the structures it effects, a systematic therapeutic plan can be formulated to halt and even reverse the disease process.
Advertisement
With periodontal disease being one of the most prevalent diseases in pets, the opportunity to provide optimum oral health for patients is a practical goal for most veterinarians. By applying basic knowledge of the anatomy and progression of periodontal disease and the structures it effects, a systematic therapeutic plan can be formulated to halt and even reverse the disease process. While a complete dental cleaning, or prophylaxis is certainly the first step in periodontal therapy, paying attention to any changes in subgingival tissue and periodontal attachment can make the difference between success and failure.
Being able to recognize periodontal problems means one must be familiar with the normal appearance and anatomy. The term periodontium is used to describe the tissues that support the teeth, including the gums (gingiva), periodontal ligament, alveolar bone and cementum. The tooth is supported in the alveolar socket as the periodontal ligament attaches from the bone across to the cementum, which is the outermost layer of the tooth's root. The important functions of the periodontal ligament include acting as a shock absorber for occlusal forces the tooth sustains, and for its epithelial attachment to keep bacteria from entering the deeper tissues. The gingival margin is the edge of tissue that usually lies closely against the neck of the tooth where the crown meets the root, the cementoenamel junction. The gingival sulcus is a groove or space between this margin and the tooth and can be up to 1-3mm in depth in the normal dog. The gingival margin of a cat is usually so closely associated with the tooth, that any sulcus deeper than 0.5mm may be considered abnormal.
Periodontal disease is initiated when the bacterium in the mouth collects with a matrix of salivary glycoproteins and extracellular polysaccharides to form plaque that adheres to the tooth surface. Plaque eventually mineralizes to form calculus. As the plaque contacts the attached gingiva, the bacteria and byproducts, joined later by the body's own immune response can cause inflammation, infection and eventually destruction of attachment tissues. Initially the supragingival plaque bacteria are Gram positive, non-motile, aerobic cocci, but as the infection progresses deeper into the sulcus, Gram-negative, motile, anaerobic rods predominate. The signs of periodontal disease include edema and inflammation of the gums, plaque and calculus deposition, halitosis, gingival bleeding when probed, ulceration, gum recession, bone loss, mobile teeth and tooth loss.
In the early phase, or Stage 1, of periodontal disease in the dog, usually just gingivitis is present, which is reversible with proper treatment such as a prophylaxis and home care. The sulcus depth is less than 3mm, and some of this is attributed to an increase in gingival height due to edema, not to attachment loss. Stage 2 Periodontal disease typically has pockets up to 4mm, with an increase in PMNs and lymphocytes in the area. Some attachment loss is apparent, so additional therapy of root planing to thoroughly clean the root surfaces is essential. Frequent rechecks every 4-6 months will help monitor the patient's condition. More severe lesions with PMNs, plasma cells and up to 9mm pockets that cause destruction of the periodontal ligament and alveolar bone loss indicates the irreversible signs of a Stage 3 Periodontitis. More aggressive therapy, with possible gingivectomy and extensive root planing will help, but the prognosis is guarded. These patients should be re-evaluated in 2 weeks and scheduled for re-treatment in 3-6 months. Teeth with pockets greater than 10mm and more extensive bone loss carry a very poor prognosis and a Stage 4 classification. Frequently, extraction is the treatment of choice, but some patient/client situations may warrant intensive therapy. Rechecks at 2 weeks, 2 months and 6 months will allow a complete assessment to determine the potential success of the treatment. Feline periodontal disease follows similar guidelines in severity of the stages, but with proportionally smaller sulcal depth allowances, from 0.5mm in Stage 1 to greater than 2.0mm in Stage 4 disease.
Periodontal disease review
Periodontal disease is a common and often serious problem in dogs and cats affecting up to 85% of them over the age of 3 years. This disease can produce irreversible alveolar bone loss and ultimately tooth loss. Potential systemic consequences can be a sequelae,.
Unfortunately periodontal health is often under-emphasized in veterinary medicine. This is due primarily to the lack of dental education provided in the past by veterinary schools. As we move further into the 21st century, veterinary schools across the country are realizing the importance of good dental health and are beginning to incorporate dentistry into the curriculum.
Good dental health must be a collaborative effort between the veterinarian, the pet owner and the pet. A breakdown in any of the pieces of this triad will make control of periodontal disease more difficult. The veterinarian must provide regular examinations, oral radiography and appropriate treatments. Additionally the owner must perform appropriate homecare on a regular, consistent basis and the pet must cooperate with the homecare. In order for good homecare to be performed the owner must be educated by the veterinarian as to the options available.
Current methods of management of periodontal disease include daily tooth brushing, oral rinses, drinking water additives, special diets and treats as well as appropriate chew toys. Occasionally systemic and local antimicrobial or local antiseptic therapy may be needed along with NSAIDs to treat pain and minimize local inflammation.
The basic dental prophylaxis
Advertisement
To perform the basic dental prophylaxis, several hand instruments are necessary. The basic hand instrument has three parts: the handle, the shank and the working end. The hand instrument is held in a modified pen grasp. The thumb and the index finger are placed at the junction of the handle and the shank. The pad of the middle finger is placed as close to the working end of the instrument as possible and positioned firmly against the shank. The ring finger serves as a fulcrum. The instrument is moved in one motion from the shoulders through the hand to the working end of the instrument. This increases leverage and prevents fatigue in the operator's hand. The proper working angle of 45 to 90 degrees to the tooth surface is the most efficient cutting angle for the instrument.
The instruments necessary for the basic dental prophylaxis are the supragingival hand scalers which remove calculus from the crown of the tooth. There are several types of supragingival scalers. One is the tartar removing forcep which is used for removing large pieces of calculus from flat broad tooth surfaces. The second type of scaler is a modified curved sickle scaler. This scaler is triangular in cross section and designed to be used above the gum line, not in the gingival sulcus. The sharp tip of the modified curved sickle scaler allows the operator to clean small areas, such as between incisor teeth. The curve adapts it for cleaning all surfaces of the tooth in both dogs and cats. These double?ended, mirror?image ends allow the instrument to be turned to clean around one side of the tooth, then the other.
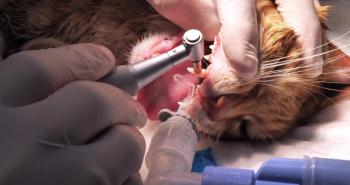
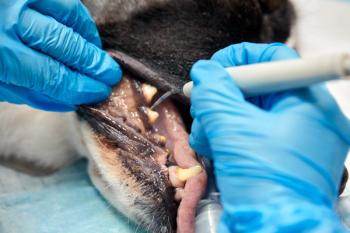
The supragingival scaling may also be accomplished using the ultrasonic scaler. The ultrasonic scaler operates at speeds of 20,000 cycles per second. It should be held so that the side of the instrument is about 15 degrees to the tooth surface and gently moved across the tooth from one side to the other. The vibrations fracture the calculus and the water mist flushes it away. However, it is often misused so that the tip strikes the tooth surface. Then the ultrasonic scaler becomes a small jack hammer, creating a very irregular tooth surface area.
Care must be given so that the tip of the ultrasonic scaler is not in continual contact with any one tooth for longer than 30 seconds at a time. This can cause pulpal damage due to the heat generated by the scaler. If a tooth is not cleaned within this time, go on to the next one and then come back after the heat has dissipated.
The most important phase of the dental prophylaxis is cleaning under the gum line. Subgingival calculus removal requires two phases: subgingival calculus removal, then root planing and subgingival curettage. Root planing is cleaning the cemental surface of the tooth. Subgingival curettage is cleaning the soft tissue that lies against the tooth. The curette is used in subgingival cleaning. It is a curved instrument with a round toe. It is used within the gingival sulcus. Used correctly, it causes little iatrogenic injury. The curette is used in a pull, oblique or horizontal stroke. All other hand instruments are used only in a pull stroke.
Once the subgingival calculus has been removed, the curette is used to perform root planing. With the curette positioned 45 to 90 degrees to the root surface, it is pulled over and over the same area in a series of short overlapping strokes until a smooth glass?like finish is created on the root surface. For subgingival curettage, the curette is angled 45 to 90 degrees against the soft tissue of the gingival sulcus. Digital counterpressure is applied against the gingival margin with the tip of the index finger. The instrument is drawn, with force (ten to fifteen strokes) against the necrotic debris which lines the gingival sulcus.
The next instrument to be used in the dental prophylaxis is the explorer/periodontal probe. The explorer has a thin, curved tip which is inserted into the gingival sulcus and moved gently around each tooth. This thin tip allows the operator to detect any subgingival sulcus parallel to the long axis of the tooth. The periodontal probe is moved around the entire tooth within the gingival sulcus to detect any variation in gingival sulcus depth.
At this point, if scaling of the teeth was done with an ultrasonic scaler, then the teeth should be hand scaled to complete the scaling process. You will find it almost impossible to completely remove all of the calculus with the mechanical scalers.
The last and very important part of the dental prophylaxis is polishing the teeth. Polishing smoothes the tooth surface area and therefore decreases the rate of plaque and calculus attachment. The tooth is polished with a white?webbed polishing cup and silicone dioxide prophy paste. A flour grade of pumice may also be used for polishing. The polishing material is slightly thick. The speed with which the polishing cup is run is between 3,500 and 5,000 RPMs, i.e. very slowly. An increase in speed is likely to cause thermal damage to the tooth being polished. A rule of thumb is to keep the polishing cup in contact with an individual tooth no longer than 30 seconds at a time. If the tooth polishing is not complete, move on to another tooth and return after the first tooth has had a chance to cool. When polishing use a short time, a light touch, and a fine grade polish. The prophy angle on the slow speed handpiece is the instrument of choice for polishing. All surfaces of the tooth should be polished, including area within the gingival sulcus.
Once the polishing is complete, the excess polish and dislodged calculus and plaque must be completely removed from the gingival sulcus. This step is irrigation. Irrigation may be accomplished using a large syringe with an 18 gauge blunt needle to flush into the gingival sulcus or by using an appliance such as the Propulse. (Caution??the Water?Pik may cause seeding of bacteria into the tissues if the water pressure is too high.) A good flushing solution is 0.1% chlorhexidine.
Now that the teeth have been professionally cleaned, it is up to you to inform the client that routine dental home care is required in order to keep the plaque and tartar to a minimum. You should educate your clients about the importance of brushing the teeth daily or at least three times weekly. Be sure that they use a toothpaste designed for pets (like C.E.T.) and not human toothpaste. Also, it is best if they will use the finger brush that comes with the C.E.T. kit because you will get better acceptance by the animal and better compliance by the owner. You should be prepared to demonstrate how to brush the pet's teeth.
If the client sees that you are serious about the dental care of their pet, they will more likely start a home care program than if you just casually mention it. Remember, the beneficiary of all this special treatment is the pet. A healthy oral cavity helps keep a pet healthy.
Helpful references
Veterinary Dentistry - Principles & Practices. Wiggs & Lobprise. Lippincott 1997
Atlas of Dental Radiography in Dogs and Cats. DuPont & DeBowes. Saunders 2008
Veterinary Dental Techniques. Holmstrom, Frost and Eisner. Saunders 3rd Ed. 2004
Veterinary Dentistry for the Technician and Office Staff. Holmstrom. Saunders 2000
Veterinarian's Companion for Common Dental Procedures. Lobprise & Wiggs. AAHA 2000
Manual of Small Animal Dentistry. Crossley and Penman. Iowa State Press. 2nd Ed. 1995
The Practice of Veterinary Dentistry – A Team Effort. Bellows. Iowa State Press, 1st Ed 1999
Small Animal Dental, Oral & Maxillofacial Disease. Niemiec. Mansion Publishing, 2010.
Advertisement
Related Content
Advertisement

Latest CME


Advertisement
Advertisement
Trending on dvm360
1
Veterinary Emergency Team in Texas deploys in response to NWS cases
2
Survey highlights gaps in canine pruritus management expectations
3
USDA approves canine vaccination for Lyme disease and leptospirosis
4
Dermatology health and the microbiome: How they interact for healthy skin from within
5