

|Articles|November 1, 2009
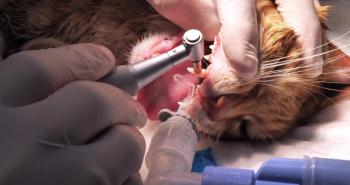
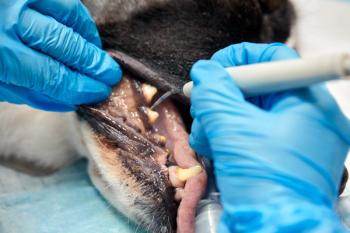
Oral surgery (Proceedings)
Author(s)Bill Gengler, DVM, DACDC
Healing of oral surgery is similar to wound healing elsewhere in the body. However, there are modifying factors within the oral cavity that affect healing.
Advertisement
Healing of oral surgery is similar to wound healing elsewhere in the body. However, there are modifying factors within the oral cavity that affect healing. The following factors all play a role in the healing process: the unique biochemical and anatomical function of the bones of the face and jaw; the protruding teeth; specialized tissue such as the gingiva; the constant exposure to contamination; and the specialized medium of saliva, food, and foreign material. Although these factors might retard healing in other areas of the body, healing in the oral cavity usually progresses rapidly, the major reason being the abundant vascular supply and antibody rich saliva.
Before attempting to perform oral surgery, it is important to have complete command of the oral anatomy. Some common principles that are critical in the success of oral surgery are: 1.) gingiva does not have elasticity but mucosa is very elastic, therefore it is important in planning oral surgery to extend the incisions beyond the mucogingival line to take advantage of elasticity for tension-free wound closure; 2.) create incision lines with rounded corners to avoid avascularity; 3.) allow for deep tissue "bites" when suturing oral tissue; 4.) avoid tension on the suture line; 5.) plan the incision so closure of soft tissue is not over a bony void; 6.) use suture needles that do not cut or tear the tissue; 7.) use surgical technique to prevent cutting of soft tissue during closure by "suture drag"; 8.) when suturing in the oral cavity always try to begin with the unattached tissue and advance toward the attached tissue. Wound healing for most healthy oral soft tissue will occur within 5 to 7 days. The suture of choice for healthy oral soft tissue is chromic gut in a 5/0 to 3/0 size when suture removal is to be avoided. Maxon, Vicryl or Dexon will require 2 to 3 weeks to absorb in the mouth and is the suture of choice when delayed healing is anticipated. The most common suture pattern used is a simple interrupted pattern, but a vertical mattress is a good pattern when extra tissue holding strength is required. Non-absorbable sutures may be used intraorally but often require patient sedation or anesthesia for removal.
Simple flap design
Simple flaps are usually used for single tooth surgical extractions, gingival repositioning, surgical endodontics or small mass excisions. The flap configuration includes a horizontal incision with a single or double vertical releasing incision. In the case of surgical endodontic exposure, the releasing incision arms of the flap may join the horizontal incision to form a U or C shape. The vertical releasing incision gives the flap elasticity from the mucosa, therefore, any flap that requires transposition must have a vertical release into the mucosa. If bony voids will be created with extraction or en bloc removal of a mass, the flap should be planned so the closure of the soft tissue is not suspended over the bony void but instead is supporting the incision. Other uses for U or C shaped flaps is in palatal defect surgery. The elasticity of the soft palate allows for caudally based advancement flap planning.
Double flap design
The double flap is often used to correct palatal defects. A common use for double flap is the correction an oronasal fistula. A segment of palate is inverted and sutured to a rim of buccal gingiva adjacent to the fistula. The buccal gingiva dorsal to the rim of gingiva is released by a double vertical incision beyond the mucogingival line and well into the mucosa. The vertical incisions are usually slightly divergent. The flap is undermined with a periosteal elevator until it has gained elasticity to allow coverage of the fistula and the palatal defect produced by the first flap. The double flap technique is usually reserved for oronasal fistula that have had previous closure failures.
Repositioning flap design
Repositioned flaps are often used to treat periodontal disease or increase crown length. Flaps can be constructed to be simply replaced back at the original attachment or positioned in a more coronal or apical position. Flaps that are simply replaced are often used to access deep periodontal pockets, debride diseased gingiva and prepare a gingival margin with healthy tissue. One commonly used periodontal technique employed for this is ENAP(excised new attachment procedure). Apically repositioned flaps are used to expose more root for crown lengthening or to reduce a void created by a subgingival slab fracture. The flap is made and the horizontal margin is elevated to the mucosa. The area is treated and the flap is repositioned in an apical direction. Coronally repositioned flaps are prepared in a similar method but are repositioned, due to the elasticity of the mucosa, more coronally on the tooth. These flaps are often used in the treatment of furcation exposures. It is important that the vertical releasing incisions for repositioned flaps be perfectly parallel to prevent voids from occurring during closure.
Frenectomy
A mandibular frenoplasty is indicated when the morphology of the frenulum causes disease to the soft or hard tissue surrounding the mandibular teeth or if the normal flow of saliva is inhibited. The goal is to improve the natural self-cleaning mechanism of the oral cavity. The technique is performed by horizontally incising the attachment of the frenulum to the mandibular gingiva near the first premolar tooth. The incision is extended to cause relaxation to the tension of the muscular attachments. The incision is closed with an absorbable simple interrupted suture to appose the mesial and distal edges.
Step-by-step directions for today's lab
1. Obtain a specimen and the following instruments-
• Scalpel
• Adson Brown thumb forceps
• Needle holder
• Mayo scissor
• Iris scissor
Advertisement
• Periosteal elevator
• Mosquito forceps
• 4/0 absorbable suture
2. Repair the gingival defect in the maxilla
• make double vertical releasing incisions dorsally from the defect at 10 & 2:00 o'clock into the mucosa
• using a periosteal elevator, undermine the flap the full extent of the incision
• with a thumb forceps try to place the advancement flap to cover the defect
• check for tension, the flap should cover the defect without tension
• close the defect with simple interrupted sutures
3. Repair the oronasal fistula
• prepare a palatal flap based adjacent to the fistula of the maxillary cuspid tooth
• be certain that the flap is 1.5 times wider than the defect
• the free end of the flap must be long enough to rotate onto and cover the fistula without tension
• create a horizontal incision apical to the fistula at the maxillary cuspid tooth
• leave 1-2 mm. of gingival "rim"
• debride the gingival "rim" in preparation for suturing
• from the lateral extents of the horizontal incision, create divergent vertical releasing incisions of sufficient length to form a mucogingival flap which will cover the palatal donor site without tension
• close the palatal flap to the gingival "rim" with a slowly absorbing suture
• suture the mucogingival flap to cover the palatal flap and donor site
4. Repair the palatal defect
• make divergent incisions extending caudally from the lateral extent of the palatal defect
• with blunt dissection separate the soft palate from the underlying Tensor veli palatini and Palatopharyngeus muscles to create a tension-free advancement flap
• the blood supply to this area is the palatine plexus and should be conserved, however dissection in this area will create substantial hemorrhage in the live patient
• close the tension-free flap to cover the defect with a slowly absorbing suture
• will put stress on this incision, so the use of vertical mattress sutures interspersed with simple interrupted sutures is advised
5. Frenectomy
• make a horizontal incision in the frenulum midway in the vertical axis being careful to not extend cranially or caudally beyond the fleshy boundaries of this structure
• the incision should extend deep to the bone and the periosteum should be separated
• close the horizontal incision from side to side to create a vertical incision line
Reference
Veterinary Dentistry Principles and Practice by Wiggs and Lobprise
Veterinary Dental Techniques by Holmstrom, Frost and Eisner
Small Animal Dentistry by Harvey and Emily
Advertisement
Related Content
Advertisement


Latest CME


Advertisement
Advertisement
Trending on dvm360
1
Tornado (the dog) touches down at the emergency department
2
Every 30 extra minutes under anesthesia raises complication risk in brachycephalic patients, underscoring the importance of peri-anesthetic management
3
Paws and profits: VetEvolve names first chief veterinary officer, NVA appoints two board members, and more updates
4
From the CVO: I’m off the clock
5