

|Articles|September 1, 2013
Introducing intraoral radiography into your patient care protocol
Author(s)Jan Bellows, DVM, DAVDC, DABVP, FAVD
Digital imaging systems will enhance periodontal wellness for your veterinary patients-when you know how to present the benefits to clients.
Advertisement
This is the first article of a five-part dvm360 series focusing on how to use an intraoral dental system as an adjunct to great patient care. We will explore images from periodontal diseases, pulp abnormalities, oral growths and trauma.
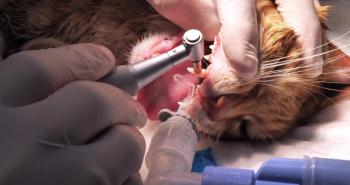
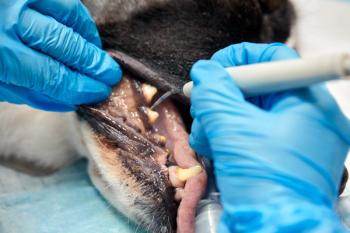
So you finally took the jump into intraoral dental imaging—the system is installed, your staff is trained, the patient has been anesthetized and you’ve got beautiful diagnostic images. But now what?
Before intraoral imaging, you saw very little subgingival evil. Teeth that appeared clinically normal were left alone and markedly mobile teeth were extracted. But now, thanks to digital imaging capabilities, subgingival pathology is evident in almost every patient. You can’t just bury your head and pretend its not there—you’ve got to discuss it with your clients.
Conversations with clients—before, during and after
Incorporating intraoral radiography in your practice of dentistry creates a conundrum necessitating changes in the way dental care is discussed and delivered. How do you best interpret the images and respond to take care of your patient and client? How do you schedule all of the necessary dental care revealed after examining the films while your patient is still under anesthesia? How do you handle client communication and financial concerns? The answers to these questions lie in the implementation of an efficient dental workflow system.
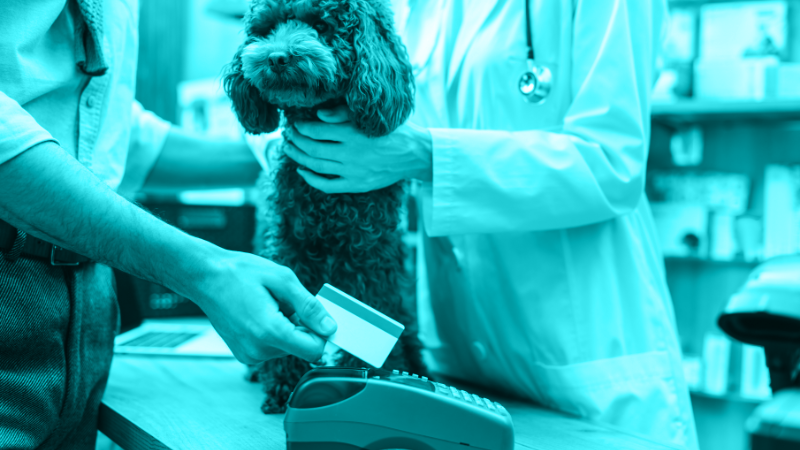
What was once a static quote over the phone and a patient drop-off for removal of tartar and plaque now shifts to a more intensive process that involves at least three conversations with your client—before they leave their dog or cat with you, during the procedure once pathology is found and after the procedure when patients are discharged.
Step 1: Preparing the client for what to expect
This conversation should include a rough timeline of what is going to happen during the day, when you will call with results of the intraoral exam and oral film findings, and what your client is able and willing to do concerning daily plaque control. This last point is key in the discussion you will have later regarding saving teeth with periodontal treatment versus performing extractions.
Every oral assessment, treatment and prevention (oral ATP) visit includes full mouth radiographs. Clients should not get to choose if their dog or cat gets full mouth films. They are at your office for the best you have to offer—and that includes full mouth radiographs. You’ll be amazed what lies below normal-appearing gingiva—pathology that’s just begging to be treated in many cases. Figure out what it takes to get this done—even if you have to incorporate this step into the cost of dental scaling and polishing.
Next, explain that the oral ATP is a two-part process—both parts can occur on the same day or on separate days when the patient is brought back for additional care at a later scheduled time.
The first part involves anesthetizing the animal, cleaning and polishing the teeth, examining each tooth with a probe or explorer, taking intraoral radiographs to identify pathology and formulating a care plan. The findings can be shared with the client in person while the patient is still anesthetized, by sending the images in a report via e-mail, or after the patient is awakened and being discharged, with treatment scheduled at a later time.
The second part involves caring for the abnormalities found during the exam that will impact the patient’s health and well-being and reviewing ways to prevent recurrence or progression of disease.
Finally, the initial fees should be discussed and agreed upon before the patient is left in your care. The client needs to know from the outset that there may be additional fees when extra care is provided, based on the examination results. Usually these fees cannot be accurately projected (not even ballparked) at the time the appointment is made or even at the initial exam room evaluation.
Step 2: Informing the client about exam findings and discussing treatment options
Intraoral radiographs provide a two-dimensional view of a three-dimensional object. The radiograph is used indirectly to determine the degree of bone loss. As periodontal disease becomes chronic, bone supporting the tooth is commonly resorbed. Forty percent of bone is gone before bone loss can be radiographically visualized.
Distribution of bone loss can be classified as either localized or generalized, depending on the number of areas affected. Localized bone loss occurs in isolated areas. Generalized bone loss involves the majority of the marginal bone. Specific areas of bone loss may be classified as horizontal (perpendicular to the tooth) or vertical (angular along the side of the root).
Periodontal diseases
Periodontal diseases can be classified in stages from 1 to 4, based on the severity of radiographic and clinical signs. In a normal cat or dog without periodontal disease, the alveolar margin resides within millimeters of the cementoenamel junction.
Stage 1 (gingivitis) occurs when the gingiva is inflamed. There is no periodontal support loss or radiographic change. Treatment involves removal of plaque and tartar. If bleeding occurs on areas that have been probed, consider treating with locally applied antimicrobials, such as clindamycin hydrochloride (Clindoral—TriLogic Pharma) or doxycycline hyclate (Doxirobe—Zoetis), followed by home care with Veterinary Oral Health Council-approved products (VOHC.org) (Photos 1A and 1B).
Photo 1A: The clinical appearance of gingivitis in a dog. Note the marginal gingival hyperemia.
Advertisement
Photo 1B: An intraoral radiograph shows signs consistent with stage 1 periodontal disease. There is no support loss, and the alveolar margin is at the cementoenamel junction (arrows).
Stage 2 (early periodontitis) occurs when attachment loss is less than 25 percent as measured from the cementoenamel junction to the apex of the root. Clinically, early periodontitis is typified by pocket formation or gingival recession. Radiographically, stage 2 disease appears as blunting (rounding) of the alveolar margin in addition to bone loss. There may also appear to be a loss of continuity of the lamina dura at the level of the alveolar margin. Follow the treatment as indicated for stage 1 disease, using the locally applied antimicrobials mentioned above if pocketing exists (Photo 2).
Photo 2: Stage 2 periodontal disease is evident with less than 25 percent bone loss interdentally between the maxillary first incisors (arrows). Clindoral was instilled after teeth cleaning.
Stage 3 (moderate periodontitis) is diagnosed when 25 to 50 percent of attachment loss occurs. The direction of bone loss may be horizontal or vertical (angular). Radiographically, horizontal bone loss appears as decreased alveolar bone along adjacent teeth. Normally, the alveolar margin bone is located 1 mm apical to the cementoenamel junction. With horizontal bone loss, both the buccal and lingual plates of bone, as well as the interdental bone, have been resorbed. Clinically, horizontal bone loss is typified by a suprabony pocket, which occurs when the epithelial attachment is above the bony defect (Photo 3A).
Photo 3A: Evidence of vertical bone loss and stage 2 periodontal disease is seen in the first molar, which has a supernumerary root.
Vertical bone loss—resulting from infrabony defects—occurs when the walls of the pocket are within a bony housing. Here periodontal disease has caused a vertical defect to extend apically from the alveolar margin. At first, three walls of bone surround the defect—two marginal ones (lingual/palatal and facial) and a hemisepta (the bone of the interdental septum that remains on the root of the uninvolved adjacent tooth). As disease progresses, two-, one-, and no-walled (cup) defects may occur. Radiographically, vertical bone defects are generally V-shaped and sharply outlined (Photo 3B).
Photo 3B: Stage 3 periodontal disease is seen at the fourth premolar. Treatment includes teeth cleaning, root planing and bone grafting to decrease pocket depth.
Treatment for stage 3 periodontal disease includes tooth extraction or, depending on the client’s ability for home care and the patient’s acceptance of daily plaque control, surgery to decrease pocket depth.
Stage 4 (advanced periodontal disease) is typified by deep pockets or marked gingival recession (or both), tooth mobility, gingival bleeding and purulent discharge. Attachment loss is greater than 50 percent of the root length (Photos 4A-4F). Extraction is the treatment of choice.
Photo 4A: Stage 4 periodontal disease is evident at the fourth premolar. Treatment is extraction.
Photo 4B: Stage 4 periodontal disease is evident at both mandibular canines. Greater than 80 percent of support loss is evident. Treatment is extraction.
Photo 4C: There is a 7-mm pocket interdentally between the maxillary first and second molars.
Photo 4D: An area of alveolar bone loss is evident between the first and second molars (arrow), as well as periapical lucency of the fourth premolar’s distal root. Treatment includes extraction of the fourth premolar and both molars.
Photo 4E: Horizontal bone loss creating stage 3 periodontal disease of the mandibular first molar and stage 4 periodontal disease of the second molar. Treatment includes the extraction of the second molar.
Photo 4F: There is evidence of stage 4 periodontal disease of both the first and second molars and stage 2 periodontal disease of the fourth premolar.
Furcation exposure
Furcation exposure results from bone loss at the root junction of multirooted teeth due to advanced periodontal disease. It’s sometimes difficult to determine radiographically whether the interradicular space is involved, unless there is a radiolucent area in the region of the furcation. Lack of radiographically detectable furcation involvement is not confirmation of the absence of periodontal destruction. Advanced furcation exposures—where both cortical plates are resorbed—are easily recognized on radiographs.
Stage 1 furcation exposure exists when the tip of a probe can just enter the furcation area and bone partially fills the area where the roots meet. Radiographically, there may be decreased opacity of the bone at the furcation. Stage 2 furcation exposure occurs when the probe tip extends horizontally into the area where the roots converge but does not exit on the other side. Radiographically, there will be bone loss at the furcation (Photo 5A).
Photo 5A: Maxillary fourth premolar furcation involvement (F2) with radiodense bone still apparent in the furcation in a cat. Treatment includes cleaning and stringent plaque control.
Stage 3 furcation exposure lesions exist secondary to advanced periodontal disease. Alveolar bone has resorbed to a point that an explorer probe passes through the defect unobstructed. Radiographically, there will be an area of complete bone loss (Photo 5B).
Photo 5B: Mandibular fourth premolar furcation exposure (F3) in a cat. Treatment includes extraction.
Extraction is the treatment of choice for stage 3 furcation exposure, since removal of oral debris from the furcation area is difficult—or nearly impossible—to achieve. Stages 1 and 2 furcation exposure can initially be controlled after the teeth are cleaned with tooth brushing and at-home plaque retardants.
Alveolar bone expansion (chronic alveolar osteitis)
Clinically, alveolar bone expansion appears as bulging alveoli around one or both maxillary or mandibular canine teeth. Radiographically, the lesion appears as bone loss around the root and expansile alveolar bone growth (Photo 6). Extraction is the treatment of choice.
Photo 6: Maxillary canine alveolar bone expansion in a cat. Treatment includes extraction of both maxillary canine teeth due to stage 4 periodontal disease.
Step 3: Reviewing the results with the client
After the oral examination and radiographic findings are discussed and the necessary treatment is performed, it’s helpful to review everything again with the client before releasing the patient. You can also provide digital reports—including the clinical and radiographic images—which can be collated in minutes and leave a lasting, positive impression on your client.
Advertisement
Related Content
Advertisement
Latest CME


Advertisement
Advertisement
Trending on dvm360
1
FDA-approved sevoflurane inhalant anesthetic for dogs enters veterinary market
2
New World screwworm updates: The latest on government, industry response, new cases
3
‘This is not going to be an isolated incident': Q&A with a parasitologist on the New World screwworm's return to the US
4
New World screwworm confirmed in United States, USDA announces
5